- July 1, 2019
- Needlework
- Sergey Kostyuchenko Zhelyazkov
Many owners of tailed friends make or buy clothes for them. And this is not done under the influence of fashion, but because of the characteristics of certain animal species. You will learn from this article about which breeds need heating in the cold season, and how to make clothes for a cat from a sock.
DIY cat socks
Do animals need clothing? Anyone who claims that animals do not need clothing is completely wrong. Our smaller brothers also get cold, their fur also gets wet, like our hair, so they also need wardrobe items. And if you think about the fact that shards of glass are often found on our streets, roads are treated with chemicals that fall on the feet of animals, and then into their stomachs and cause all kinds of illnesses and even death, then every loving pet owner will certainly want to put shoes on their four-legged friend .
DIY cat socks are also relevant, especially during the cold season. Of course, for the street, when the ground is covered with snow or puddles, ordinary socks are not suitable. But for the home, this is a completely reasonable idea.
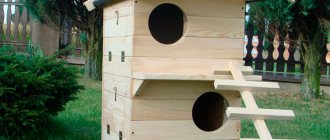
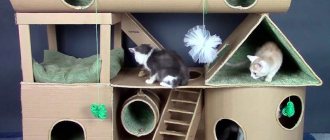
People who have “golden hands” can easily make cute cat socks themselves. In general, it’s good when a person has the talent to create with his own hands and create beautiful and necessary things. My friend’s father built a beautiful two-story house from a small house. The whole family helped him.
It was beautifully done, it’s a pleasure to look at. He did all the necessary work himself, plastering himself. Of course, it’s great when a person can do everything beautifully himself, but if this is difficult for you, then you can turn to professionals for help. Fortunately, there are worthy specialists who are well versed in the types of decorative plaster and in their hands, decorative plaster will delight you greatly. It’s a pleasure to come to a beautiful, cozy home, full of love and harmony.
How to make socks for cats with your own hands?
If desired, socks for Murka can be purchased at a pet store, but why waste money if these clothes can be made with your own hands. This is a fascinating process in which you can show your imagination. This can be done in several ways. For example, you can use children's socks. For work you will also need: scissors, needle, thread.
Initially, you should purchase children's socks. The length of the foot of the sock should reach the cat's knee joint. By the way, when choosing socks, preference should be given to natural fabric, which perfectly retains heat, breathes and does not cause irritation. It is best to buy socks that do not lose lint and whose color is the most natural. Next, you need to take scissors and cut off part of the sock along the entire width of the product so that it fits the animal’s leg. Then we sew the sock in the place where we made the cut, turn it inside out and put it on the mustachioed fashionista.
By
How to sew a cat from socks with your own hands
- Place your toes with your heels facing up. Draw a pattern on them (we drew with a felt-tip pen)
Pattern - cat made from socks - Cut along the lines. So, from the first sock you should get two hats and a cat's face. And from the second - the body and tail.
- Now we sew the cat and stuff it with stuffing. DIY cat made from socks is ready
Take two socks
Cut the parts along the marked lines
We stuff the cat's head with stuffing and sew up the hole.
Stuff the body with stuffing, sew up the hole
All details are ready. Sew the head and tail to the body
Ready cat from a sock
Hats for cats
The sock kitten is ready
DIY cat harness
The cat often does not respond to its own name or the owner's call. During a walk, this animal, succumbing to curiosity, immediately begins to explore the area or hides in secluded places. That’s why it’s better to put a harness on your cat outside.
The use of this accessory will protect the animal from being run over by vehicles. During long trips, the use of the product is necessary.
Externally, the accessory is a thin belt that is put on the cat. Fasteners are placed on the pet's neck and chest. The ring is on a strap, located above the shoulder blades, and a leash is attached to it.
This design allows you to avoid pinching the thin neck and will protect you from injury. Some types of accessories are equipped with a collar. A DIY cat harness will help you save money on purchasing an accessory and add a stylish item to your pet’s wardrobe.
Finishing touches
The final stage is not at all difficult. We sew on buttons as eyes, embroider a nose using satin stitch, embroider a smile, make wide stitches on the paws. A sock cat can be just cute, or it can be cheerful and funny. If the child who is helping you is still small and does not know how to sew, then he cannot be trusted with this task. Since you make the product yourself, the degree of cheerfulness of the cat depends only on your imagination. The smoother you embroider, the more serious and accurate the work will be.
It turns out to be such a wonderful hand-made cat made from a sock! Any baby and even an adult child will be delighted with such a toy. If you rarely do sewing, then you should start with these easy-to-create and beautiful toys. Any socks will do. Color, texture, thickness of fabric, fluffy or not - you choose. The craft can be decorated to suit every taste.
Show your imagination how you want your cat to look. You can finish drawing his mustache and also embroider it. Or sew thin strips of fabric in the form of a mustache. Or maybe make a hat for him and sew on a butterfly? Your cat will turn out to be a real gentleman! Or is it a stylish and fashionable cat? Then she will need a bow or a flower, a headband or some other decorative element.
DIY cat harness. Step-by-step instruction
Option No. 1. Jeans harness
It is better to use a jeans belt. But you can also take pant panels.
- Measurements are taken from the kitten. To do this, make a girth around the neck, as well as under the chest of the kitten. When measuring, insert your index finger under the measurement so that the future harness does not pinch the animal. Make an allowance of 0.5 centimeters on both sides.
- Cut the strips according to the measurements. To connect two strips together, a third element is cut.
- The parts are sewn together by hand using short stitches. The thread is selected in accordance with those used to sew the jeans.
- The two harnesses are connected to each other by jumpers. Sewn on.
- They cut the leash. Its width should be at least 3-5 centimeters. The optimal length for walking is 1.5 – 1.8 meters.
- A button is installed on the edge of the leash, and a rivet is placed 6-7 centimeters closer to the center of the leash. Having passed through the jumper, the leash is secured using a button and a rivet.
The leash for walking is ready. A denim leash will add variety to your pet's wardrobe.
DIY cat harness. Option No 2
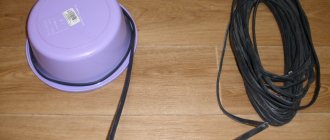
- Thin leather straps. You can use a flat nylon rope.
- Buckles.
- Rings.
- Carbine.
- Thick needle.
- Scissors.
- Awl.
- Strong threads.
The design is created in the form of two belts covering the pet’s neck and body. They are connected to each other by a special strip. A leash is attached to the jumper or one of the straps. The design is secured with a buckle and carabiner.
- Measurements are taken from the animal. Neck and chest measurements are taken.
- Cut off two pieces of the strap, making allowances of 2 centimeters. The third piece is needed to create a jumper bar.
- Cut off 1.5 - 1.9 meters of the strap. This will be a DIY cat leash. A carabiner is attached to one end, the other is bent in the form of a loop, into which the owner’s free hand can enter. The loop is stitched.
- If a flat rope is used instead of a strap, its ends are burned with fire.
Option No 3
- A piece of raincoat fabric.
- Fleece fabric.
- Rubber.
- Strap.
- Braid.
- Decorating ribbon.
- Lock.
- Fastening elements.
- Decor.
- Roulette.
- A sketch is drawn on a piece of notebook paper. You can draw the parameters for the finished accessory.
- The pattern is transferred to raincoat fabric and fleece.
- The place for the braid is marked on the fabric and stitched.
- A braid is attached along the spine and a loop is left. A ring is threaded through it. It is needed to secure the leash.
- The neck is made from raincoat fabric. An elastic band is sewn onto it, collecting the fabric. You can use braid for decoration.
- The neck is attached to the base. The edge is folded. During sewing, it is necessary to try on whether the design will put pressure on the animal.
- Assemble the fastening parts. Straps are inserted inside, attached, the edges are processed and stitched. The product is put on the cat to adjust the length of the belt.
- Decorate the base. The product is decorated with bows, stones, rhinestones - to your taste. Braid and decorative tape are attached along the edges.
- The harness is put on the pet. The leash is attached to the ring.
A well-made accessory will arouse interest among cat lovers' friends. You can share useful experience and tell how to make a harness for a cat yourself.
In what cases is the use of a harness prohibited?
- If an animal is not vaccinated, veterinarians prohibit it from walking outside. A cat can catch the disease from street animals.
- It is not recommended to take small kittens outside. The immunity of children is not sufficiently developed.
- It is difficult to train cats over 10 years old to wear a harness. They do not recognize an accessory made even from things that are familiar to them. Therefore, it is better to walk them in sparsely populated or deserted places.
- It is not recommended to walk pets with a harness after illness, surgery, or pregnant cats.
- If a cat is terrified of a leash or begins to behave aggressively at the sight of a harness, you should not try to force train it.
Did you like the article? Subscribe to the channel to stay up to date with the most interesting materials
Source
What you need to make a cat from socks
- If you are making a cat from socks for an older child or as a gift for mom, then it is better to use synthetic padding or cotton wool as a filler.
- To make a cat you will need 2 small socks. The brighter the socks, the more fun the kitten will be. You can take terry socks, then the cat will turn out fluffy. The size of the cat depends on the size of the socks. In the video, a cat is made from socks for a 14cm leg.
- You also need scissors, a needle, thread, eyes, antennae, a mouth, chalk or a felt-tip pen with which you will draw the pattern.
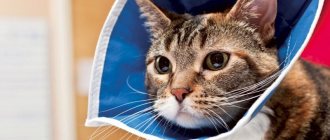
Why do you need shoes?
Owners put boots on their pets for the following reasons:
- Protection from chemical reagents on the roads of megacities.
- To prevent damage to dogs' paws from debris, broken glass, hot or too cold asphalt.
- To protect furniture and apartment walls from your pet's claws when they are not using a designated scratching area.
It is especially important for parents with small children to wear cat shoes. Since a baby can pull an animal’s tail or whiskers, and the pet may not like it, boots help protect the child from scratches from the animal.
It is better to buy slippers for your cat than to trim his claws or have them surgically removed; it is safer. Breeds such as Sphynxes and Devons, which do not have fur for warmth, need additional protection from the cold. These boots will help protect your animal from freezing in the winter or prevent burns when stepping on a hot surface.
Advantages and disadvantages
The main advantage that boots provide for an animal is the protection of its paws from external influences. Thus, the owner does not have to worry about preserving the health of the pet. One of the disadvantages is the difficulty of putting on shoes, since it is not typical for an animal to like clothes and shoes. At first, you won’t be able to get dogs or cats to calmly put on slippers; they will try to take them off. To overcome this reaction, you must initially teach them to wear socks at home, and then go outside in them. Sometimes you won’t be able to do this, you have to come to terms with it and not torment your friend.
How to choose?
Main parameters for selection:
- seasonality;
- waterproof;
- naturalness of the material;
- hypoallergenic.
The animal's paws must be properly secured with boots.
The owner chooses the appearance of the shoes according to his taste, but for the animal it is important how functional they are. Veterinarians say that the sole of the boot should have treads so that when walking the kitten or dog does not slip or move apart. The most convenient fixation is laces or Velcro. They should fit snugly against the paw, but not pinch it. So that the animal does not lose it, but also cannot remove it. The material must be durable, otherwise it will be of no use.
Who needs extra warmth?
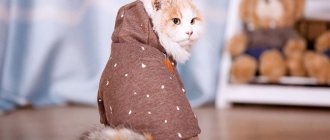
Representatives of the cat family have long been the owners of fluffy fur coats, which, in addition to external beauty, perform a number of important functions. They warm the mustachioed purrs, protect them from wind, moisture, and also help camouflage domestic predators.
But not all tailed animals are endowed with thick fur. There are completely hairless or very short-haired breeds that are somewhat popular among people prone to allergies. However, such pets require special care. The fact is that their body temperature is always elevated, and in the cold season such cats need additional warmth, which is why their owners dress them up in original things.
Below is a list of cats that need extra warmth:
- The Sphynx is the most famous breed of hairless cat. Famous for its abundance of folds and wrinkles, as well as its large ears.
- Peterbald - the breed appeared thanks to crossing. The coat usually does not exceed 2 mm; some individuals have eyebrows and whiskers.
- Kohana - those with smooth skin, even if they want, will not be able to acquire hair, because they do not have hair follicles.
- Levkoy is another result of crossing breeds. They have funny forward-curved ears and an incredibly easy-going disposition.
- Bambino is similar in appearance to a dachshund due to its long body and short legs, which sometimes makes it difficult for him to jump to the desired place.
- The Elf is a new breed, bred in 2007. A characteristic feature is the ears curved in the opposite direction, which is why they resemble fairy-tale creatures.
- Minskin is a short-legged representative of hairless cats. Unlike other brothers, it has thick hair on its ears and head.
Safety regulations
Natural materials must be washed and dried thoroughly before use, and toys with food must be stored in a dry place - pasta and cereals are afraid of moisture. The bags must be sewn or tied in such a way that the baby cannot, under any circumstances, reach their contents.
Also visit the articles
Here you will find 4 simple master classes, and 3 of them do not even require sewing! Very simple and funny toys made from socks that both babies and older children will appreciate.
Cute cats made of fabric. We made them scented - we added essential oils. Go to the article and get free patterns and master classes.
The main principles of sock sewing
Despite the very wide selection in stores, many owners prefer hand-made sewing, and there are a number of reasons for this.
First, you know what kind of fabric you are using. It is very important that it is natural to avoid allergies or irritation to the sensitive skin of the purr.
Secondly, sock cat clothes are quite simple. There are no elements in it that will hinder your pet’s movements or allow you to get confused in them. Do not forget that cats are playful and active animals, and tight clothing will not allow them to spend energy as they should.
Therefore, if you decide to make clothes for your cat with your own hands from a sock, you should make sure that the product meets the requirements described above, and you should not weigh it down with unnecessary accessories. In addition, be sure to check the elastic - it should not be too tight so as not to squeeze the animal’s neck. Having made sure that all points have been met, you can safely get to work.
Patterns + step-by-step instructions
Dress
To make a dress for a cat with your own hands, all you need to do is find a pattern and materials. In fact, it is an ordinary sleeveless vest, which is made according to a simple sketch.
Slots are made in the fabric for the paws, the edges are overcast and stitched. The fasteners are sewn on the back. This could be a zipper, ties or Velcro. A skirt with flounces is attached to the vest (they can also be attached to the sleeves).
Any decorations will do, as long as they are safe for the animal (bows, ribbons, ruffles, lace or frill).
Overalls
Overalls are stylish clothes for a cat that will keep him warm and comfortable. The overalls are sewn in layers: raincoat material is used for the top, fleece or knitwear is used for the lining.
The pattern consists of several elements: the left, right side and a wedge that is sewn between the front legs. The cuttings are placed on a fabric sheet, outlined, cut out taking into account allowances, pinned and tried on the cat. Well-fitted parts are connected.
How to sew an item? First, the upper and lower parts of the suit are fastened together. The lines on the sides and in the shoulder part are sewn with a zigzag seam. Afterwards the edges are processed. The last step is to sew on the clasp and accessories (this could be pockets, stripes and other decorations).
This type of clothing for Sphynx cats can be complemented with a hood to protect the animal from moisture and precipitation during a walk.
T-shirt
In the summer, it is advisable to protect the delicate skin of sphinxes from ultraviolet rays. To do this, you can sew a T-shirt from light fabric.
They take a schematic drawing as a basis, print it out and apply it to thin knitwear.
How to sew clothes for a pet? Step-by-step instruction:
- First, measure the length of the T-shirt. The back is folded in 2 layers, cut out, and a few centimeters are added so that the item does not restrict movement.
- Next, fold the two edges together and sew the parts together. Before stitching, the parts are fastened with pins.
The neckline and bottom do not need to be processed if the fabric does not fray.
Pajamas
Pajamas are comfortable indoor clothing for Sphynx cats who do not have fur. They will sleep comfortably in it. Fleece or flannel are suitable materials.
Before sewing clothes for a cat from your own fabrics, it is worth transferring the sketch onto the canvas. Then the holes for the legs are cut out and the armholes are processed.
Then loops are made and buttons are sewn on. The stitches are overlapped and processed in a zigzag pattern so that the folded ends do not press on the skin while sleeping.
The tuxedo
Sewing a tuxedo is much more difficult than other clothes for the Sphynx, for example, a blouse. It is better for beginners not to take on such work. This will require the ability to cut and perform complex finishing. Therefore, it is better to knit a tuxedo on knitting needles.
It is knitted in the same way as a sweater. At the same time, the length of the item is adjusted, since the front should be longer than the back. The butterfly can be black or brighter, such as red or burgundy.
Airy skirt
These hand-sewn clothes for the Sphynx are great for walks, holidays and photo shoots with the cat. Often at exhibitions, animals are presented in front of judges in stylish outfits.
Airy skirts are a good example of such things. They are made from tulle and satin ribbons. To make a lush tutu, you don’t need a drawing. Before sewing, measure the “waist” and add 10 cm to the resulting figure.
The ribbon is cut to this length. Next, the tulle is cut into strips 2 cm wide. The length indicator should be equal to the expected length of the pack, this value should be multiplied by 2. Then the tulle strips should be folded in half and loosely tied onto a ribbon in knots.
The fullness of the skirt depends on how tightly the material is knitted. To add volume, the length of the stripes varies. The tutu is tried on, and the ends of the ribbon are tied on the cat’s back.
Vest without pattern
To make a vest for cats with your own hands, you don’t need schematic drawings. To make the thing, you will need an ordinary sweater. How to make a vest (step by step instructions):
- Cut off the sleeve and place it on the table so that the seam is at the bottom and the fold is at the top.
- The collar will become the bottom of the vest. This part needs to be trimmed: the back will be longer and the front will be shorter. After this, folds are made or a ribbon is sewn on. In this case, the seam is located in the front.
- The place where the elastic is on the sleeve should correspond to the collar.
- The location of each armhole is determined as follows: a sleeve is applied to the cat, and then oval-shaped slits are made and processed along the edges.
Insulated model for walking
For a knitted sweater, you can also use a simple pattern to work with knitting needles and natural wool yarn (such as angora).
The diameter of the knitting needles is determined by the thickness of the threads. Before knitting, it is advisable to soak the yarn in water with a powder with a slight odor and hang it to dry in the fresh air.
To make sleeves on both sides of the knitted fabric, you need to add 18 loops, then knit about 10 cm (depending on the cat’s parameters) and close the 21st loop in the middle. For the next row, make another 28 over the closed loops and knit 10 cm in stockinette stitch. Then you will need to close 18 stitches on both sides. After knitting 10 cm, make an elastic band (its height is 3 cm) and close off the loops that remain. When everything is ready, start knitting the gate.
For those who are looking for easy, quick and budget-friendly ways to solve problems, clothes for the Sphinx can be made from socks. To do this, buy models without heels or look for not very worn pieces in your wardrobe, cut off the required length, then cut out the neckline and armhole (they can be additionally crocheted). Such clothes for the sphinx do not require a pattern - a schematic explanation is enough. Then the workpiece is sewn along the shoulder line. To prevent the resulting sweater or vest from riding up, two ribbons are tied to the bottom and the cat’s legs are threaded through them.
How to take measurements of a cat
Before starting to sew clothes from a sock for a sphinx or other similar animal, some owners take measurements from it. This will make the sweater more comfortable. There are three main measurements:
- neck girth;
- body girth (behind the front and in front of the hind legs);
- back length (from neck to base of tail).
Additionally, you can remove the volume of the paw if you want to add sleeves to the sweater. When taking measurements, it is very important that the animal is calm and standing on all fours. If you are not sure that you can handle it yourself, you should seek help from members of your household who will help calm the mustachioed one.
If the cat categorically refuses to have measurements taken, you should not torture the animal or cause it stress. It's easier to make a sweater using the standard pattern.
Fabric cutting
The creative process is quite simple:
- First, you need to turn your socks inside out. The first sock will be needed for the head and tail, the second - for the body and four legs. If your child is helping you, you can give this task to him. If the products are terry on the inside, then the reverse side can be the front side, so that the cat from the sock turns out to be fluffy.
- You can turn the toe horizontally to make it more comfortable. Then draw paws on it.
- On the second sock we draw ears. The heel will become the muzzle a little later.
- Next step: cut and fold along the seam. You need to cut not directly according to the drawing, but retreating a few millimeters so that you can sew along the drawn lines.
How to make clothes for a cat from a sock
If you want your pet to be comfortable in winter, then you need to have a couple of warm clothes in reserve. In order to make clothes for a cat from a sock, you need to prepare only three things: a warm sock, scissors and chalk. Next, based on the measurements taken, do the following:
- Mark the required length on the sock using measurements or simply placing the sock against the cat. Draw a cut line with a small margin.
- After ironing the sock, cut off the excess.
- Now you need to mark the slots for the paws. If you don't have measurements, make cuts in the middle of the sock to create a wide collar. It is very important that the holes are symmetrical.
- After marking them, make cuts. Afterwards they can be overlocked with an overlocker or by hand.
- If desired, you can make sleeves from the remains of the sock by sewing them to the slits.
- You need to try the finished sweater on your pet and make sure that it is not too tight for him. To do this, place your palm under the sock. If it fits in freely, then the blouse fits the cat. Do the same with the neck.
Ideas for cats made from socks
If you decide to sew a toy for a child under 1 year old, then it is better to simply draw the eyes, mouth and antennae or embroider them with thick threads. For such children, the toy can be filled with cereal. This sock cat with cereal will be an excellent exercise machine for developing fine motor skills. for fine motor skills.
Pros and cons of clothing made from socks
Like any clothing, cat sweaters made from socks have a number of advantages and disadvantages. The main advantage is that the product is sewn quickly and easily. Even the lack of measurements is not a problem for creating such clothes. Another undoubted advantage is that everyone has warm terry socks, so in case of emergency it will not be difficult to get material for sewing. And, of course, another plus is the convenience and comfort of such a sweater for your pet.
As for the disadvantages, the main thing is the fragility of these clothes. But, considering that you can make clothes from a sock for a cat in just an hour, this drawback does not seem so significant. Another not-so-pleasant point is that such a jacket may not be suitable for large animals. In such cases, you can use your old sweater.
Source
Assembly of parts
Further work is also not difficult:
- You need to leave a hole in each part to insert the filler. Leave a hole in the head and tail in those places that will be sewn to the body, in the body itself - between the lower legs. To make it more convenient, before sewing on a machine, you can baste the seam with thread. If you plan to sew by hand, you can secure the seam with safety pins.
- Now you can relax if a child is involved in creating the craft. He will do an excellent job with the next task. Now is the time to fill the sewn parts with filler. Show an example of how this can be done and admire the process. Children really like this activity.
- We sew up the ends and tighten the holes on the body, they are no longer needed. This can be done not by machine, but by hand - with a hidden seam. Insert the needle on the left side of the hole from the inside and take it out from the outside. Now insert the needle on the right side, also from the inside, and pull it out. Pull the thread until the edges meet. Insert the needle again on the left side from the inside, pull. And with such a hidden seam, sew the hole up to the end. It will remain inside and will be practically invisible from the outside, especially if the socks are fluffy.
- The head and tail are sewn up a little differently. Here we also need to tighten the hole, but there is no longer a need for a hidden seam. Insert a needle from the inside of the hole and draw the thread in straight stitches along the entire edge. Tighten the thread, make a knot and the head is ready.
- Now let's connect the parts. A sock cat gets its head and tail.
- The tail must be attached by first making a small hole. And then sew it on so that the fabric does not stick out.
- A child can draw a face for a cat. If it is important for you that the muzzle is neat, do it yourself. We draw with chalk, soap or a marker, as when cutting fabric.