The body of cats is usually covered with a beautiful fur coat, which becomes even thicker and warmer with the onset of cold weather. However, some representatives of the cat family do not have thick fur, so they need additional insulation. You can warm your cat without causing her discomfort using special clothing.
The cat suit has a simple cut, so sewing it does not require much tailoring skill. Do-it-yourself outfits will cost much less than ready-made analogues. How to correctly take measurements and make a pattern for clothes for a cat? What materials and tools will be needed for sewing?
How to sew clothes for a cat
When choosing materials to create an outfit, pay attention to the composition and tactile sensations. If you enjoy touching fabric or yarn with your cheek, then your pet will most likely like the material. To make something that is not only beautiful, but also convenient, with your own hands, you will need a little time and the ability to hold a needle or knitting needles in your hands. We have prepared for you several universal photo patterns, using which you can sew or knit many outfit options. Clothing for cats is very easy to sew if you know some universal techniques. For example, it is not necessary to create new drawings every time. Using the patterns that you will see in the photo below, you can sew not only a T-shirt, but also many other things:
- a T-shirt, if you finish the sleeves;
- a jacket for walking outside, if you add a practical hood;
- dress, if you lengthen the pattern a little.
The request returned an empty result.
To sew clothes for a pet, there is no need to constantly make new patterns. It is enough to do your job well once and then use ready-made blanks.
You can create a T-shirt, bodysuit, blouse, jumpsuit, suit and any other outfit.
You will just need to make small adjustments.
Cat in a blouse
Knitwear works well for a T-shirt. If you take a warmer material, for example, fleece, and make a larger cut for the head, you will get a jacket for walking in the evening. There is nothing complicated about this. You just need to add a little of your imagination.
Sewing clothes for a cat is easy. You need to correctly take and transfer measurements to the material, sew everything together and the outfit is ready. If you follow all the recommendations in our article, the result will shock you. How elaborate the outfit will be.
In order for a pet to wear clothes, it must be taught to them from an early age.
To do this, animal psychologists recommend rewarding your pet somehow for each trip in a new outfit, letting him know that he is doing the right thing.
Do this as needed.
For whom are clothes salvation?
Most domestic “tigers” do not need such accessories, because nature has awarded them with a beautiful and rich fur coat, which also acts as a thermostat and protects them from all unfavorable environmental factors. Less fortunate are short-haired cats, which freeze even in heated rooms in cold weather.
However, there is another category that is not at all lucky. These are artificially bred breeds that are life-saving for allergy sufferers, but pay for the lack of fur with a constant feeling of cold. These cats, which are freezing even in summer, always need clothing. “Greenhouse” breeds include:
bambino;
Devon Rex;
lefty;
Peterbald;
other sphinxes - Don, Canadian.
There are owners who dress up even those cats that do not need clothes. It all depends on the animal: if it favors this type of care, then the owners can only be envied.
Overalls for a cat
For this model you will need only one measurement - the length of the back (2 measurements, AB in the picture) Do not forget to try the product on the cat from time to time as you sew, adjusting the measurements to the width and length. Leave a little free space along the bottom of the legs into which to insert an elastic band.
Step 1. Draw a line on whatman paper equal to the length of the cat's back. Divide this value by eight - it will be the edge of the grid square on which you build your pattern. For example: the length of the animal’s back is 20, which means that squares must be built with sides of 2.5 centimeters. Outline the mesh, then carefully, according to the cells, transfer the outlines of the pattern from the drawing. The pattern should consist of several parts, the largest of which are the right and left sides, and the small one is a wedge that will be located on the chest and stomach (it must be sewn between the front legs).
Step 2. The overalls must be sewn in layers - for the upper part you can use low-maintenance raincoat fabric, for the lining take soft fleece or flannel. If you want, diversify the model with a hood - this will completely prevent your cat from getting wet when walking in the rain.
It is advisable to make the fastener on the upper back. This way the cat won’t be able to damage your hands when trying it on and won’t tear the zipper while wearing it.
Clothes without a pattern (from the sleeve of an old sweater)
An express option for making a warm outfit for a cat or kitten will be useful for those who have zero sewing skills and do not know how to make patterns. It will also help out when it gets very cold and you urgently need to come up with some temporary clothes for a freezing cat. The starting material for such a quick production kit is old sweaters made of thick knitwear, fleece sweatshirts or children's pants.
Knitwear and fleece retain heat perfectly and have sufficient elasticity, thanks to which clothes made without a pattern will perfectly fit the pet’s body. Before you start making clothes, you need to make sure that the selected material is soft and will not ripple.
Stages of work:
- Using a measuring tape along the back, measure the distance between the cat’s front paws, as well as the length from the top of the neck to the interscapular fossa;
- measure the length of the back from the neck to the base of the tail;
- lay out the cut sleeve or trouser leg on the table, smooth out all the folds;
- step back horizontally along the upper edge to the level of the shoulder blades and lower vertically by half the measured distance between the paws, and then draw a horizontal line on the fabric approximately equal to the half-circumference of the paw in its upper part;
- Using sharp scissors, cut both layers of fabric at the marked location;
- Mark the length of the back along the upper edge of the sleeve and cut off the excess, making a bevel so that the length of the tummy is approximately 10 cm shorter than the back;
- try the product on the cat, then, if necessary, adjust the holes for the front paws and narrow the back part using darts or by placing the edge on an elastic band;
- If necessary, overcast the holes for the paws and the back cut.
The first stage is searching for patterns and preparing tools
To make a beautiful outfit for your pet with your own hands, you need to choose not only the type of clothing, but also the material. Both cases have their own nuances.
Choosing an outfit type
The choice of type of clothing directly depends on the purpose it serves, as well as on the season. For summer, you should choose T-shirts or a vest; for spring/autumn, a sweater, vest and light jacket are suitable, and for winter, a warm winter jumpsuit.
Fabric selection
The choice of material must be made based on the following criteria:
- purpose: everyday wear, at exhibitions, protection from dirt;
- season: summer, autumn and winter things;
- characteristics of the breed.
Based on these parameters, the requirements for the fabric are determined: wear resistance, moisture resistance, ease of cleaning, heat retention, fading in the sun.
Regardless of who will wear the clothes (kitten, cat or cat), it should be sewn or knitted from natural materials. Otherwise, there is a risk of developing allergies and dermatitis.
Most often, things for cats are made from viscose, cotton, linen, wool and synthetics. There are mixed models, the creation of which uses several types of materials at once. Each material has its own advantages and disadvantages. Therefore, carefully read the description of the selected fabrics.
If you need to sew a suit or any other type of clothing, then you will need a needle and thread and scissors. A sewing machine will help speed up the work process and make it better. If knitting will be used, then knitting needles and a hook are needed.
How to take measurements
To knit or sew, you need to take measurements of the animal. A knitted or sewn item of clothing is made to the same measurements. Therefore, it is enough to measure your pet correctly once.
The following quantities are required for operation:
- neck girth;
- back length (from the neck to the beginning of the tail);
- body girth. Measured just behind the forelimbs.
Other measurements are additional (for example, the distance between the paws). They arise if you need to sew a special suit. For standard outfits, these three measurements are quite enough.
When measuring the size of an animal, there is no need to leave extra centimeters in reserve. All measurements are carried out with the same centimeter, which during the process of taking measurements is in a free, and not in a tense, position. The result will be a small reserve, which will be enough for seams.
With the help of successful patterns, even an owner with no experience in sewing can create original clothes for his pet. Almost any clothing for a cat can be made with your own hands if you have successful patterns and patterns. Therefore, the first stage of work is to search for patterns and prepare materials.
Regardless of what type of clothing will be made for the cat - a shirt, dress or overalls, the owner should not forget that the clothing must first of all be comfortable and not cause discomfort to the pet. Therefore, when taking measurements and drawing up patterns for animal clothing with your own hands, the owner needs to be extremely careful and careful.
Taking measurements should be done using a centimeter tape. It is important to obtain the following measurements:
- neck and back parameters;
- girth of the chest, abdomen and torso;
- paw circumference;
- head circumference;
- width between paws.
You should take care of consumables and tools in advance. If a costume for adult cats or cute clothes for kittens is sewn with your own hands using a sewing machine, then in the process of work, in addition to fabric, the master will need other accessories:
- cutting tools;
- needles;
- accessories;
- threads;
- tape measure;
- crayons;
- overlock;
- sewing machine;
- pattern for creating patterns and transferring them to fabric.
Why does a cat need clothes?
Street and many purebred cats have thick fur with an undercoat that keeps them warm even during winter walks. However, there are breeds with a modest coat or no coat at all. As a rule, these are elite hybrid cats whose ancestors lived in Southeast Asia or on the African continent.
Their natural habitats are characterized by hot weather and the absence of winter. In such a climate, individuals with short hair with virtually no undercoat survived better. In addition to natural selection, these cats were worked on by breeders who, through crossing, developed hairless breeds such as the Sphynx.
These exotic animals are also in demand in Russia. Once in our cool climate, hairless cats feel cold and can catch a cold, so owners should take care of warm clothes for them. A jumpsuit or other type of clothing will keep your cat healthy and help her feel comfortable in any weather.
What measurements need to be taken and how to do it?
To create a pattern you will need the following parameters:
- neck circumference (NC);
- chest girth (CG);
- waist circumference (WT);
- back width (ШС);
- pelvis width (W);
- back length (DS);
- length from collar to paw (LOW);
- length from collar to chest (DOG);
- length from waist to tail (DTK);
- sleeve length (SL);
- front paw girth (FPL);
- hind paw girth (HLP).
Measurements are taken from the animal using a measuring tape. For this procedure, it is better to invite an assistant who will hold the cat in place at the time of measurements.
Obsessive desire or necessity?
An outfit for a cat should, first of all, perform a protective function, which is to warm the body. For smooth-haired breeds and sphinxes, clothing is the only option that protects against hypothermia, since, due to their small fur, their thermoregulation is weakened. Therefore, to maintain body temperature at the desired level, animals need to create comfortable conditions.
For warmth
During the summer, such pets are exposed to sunlight. In this case, a suit made of light fabrics is suitable. It will protect the cat's sensitive skin from ultraviolet radiation and thereby prevent it from getting sunburned.
Long-haired animals do not need clothing. However, the reality is that fashion trends have spread to pets. This is especially true for cats that often participate in exhibitions. In an effort to emphasize the beauty of their pet, owners sometimes dress them in unique outfits. Cats dressed in such attire evoke tenderness and positive emotions. But in pursuit of aesthetics, some owners do not think that these clothes can cause discomfort to the animal.
Taking measurements
To take measurements correctly it is recommended:
- Place the cat on its paws and take a tailor's meter.
- Take measurements of the neck circumference and length of the animal. The last measurements are taken from the base of the pet's neck to the base of its tail.
- The length of the body is measured across the abdomen, and its girth at the widest point.
- The girth of the paws is measured at the base.
These are standard measurements. Sometimes you may also need:
- length of front and hind legs;
- Head circumference;
- distance from the base of the neck to the eyes. If we are talking about making a hood.
Scheme of taking measurements
Before proceeding to sewing and cutting the fabric, it must be washed and ironed. You will be able to see if she is molting, or maybe even sitting down. Fold the fabric in half in the direction of the grain.
Start cutting out large parts at once, and then small ones.
During the cutting process, pin the pattern in several places so that it does not fall off.
Pajamas
Sweep the finished parts with bright threads of a different color and try on the outfit on your pet. If all is well, you can sew. If there are mistakes, clarify them with chalk and correct them.
Preparing for work
Before you begin, you should decide on the purpose of the pet costume, the frequency of its use and design. Any homemade clothing for cats must include:
comfort: when worn, the pet is comfortable in the outfit, its movements are not constrained; quality: when making clothes for a cat with your own hands, you need to pay attention to non-artificial materials. Only inserts or trim made of synthetics are allowed
The reverse side of clothing for cats should be completely natural to avoid allergic reactions; simplicity: simple cut of clothes ─ a minimum of seams and costume items; practicality: clothes for frequent wear should not lose their appearance after cleaning and washing.
Material selection
You need to decide whether the cat's clothing will be sewn or knitted. In the first case, fabrics, accessories, and finishing are selected. In the second ─ suitable yarn.
Choosing the material for your pet's clothing is the most important part of the work. If the cat doesn’t like it, all efforts will be in vain. It is difficult to force your pet to wear such clothes.
In order not to make a mistake with the choice, you can first put the selected material or yarn on the cat’s bed. The fabric must first be washed with a neutral detergent. If the surprise on the bedding does not cause protest from the pet, then you can safely start creating patterns, sewing or knitting.
It is better to choose soft, flexible fabrics for cats: knitwear, cotton or linen with a stretch effect. Clothes made from this material are comfortable and will not hinder your pet’s movements. The appearance of things will not suffer from frequent washing.
The finished knitted product must be washed.
Taking measurements
Creating clothes for a pet with your own hands begins with creating a pattern, for which you need to take measurements
It is important to determine the size correctly. The fit of the product on the cat and its comfort depend on this.
To take measurements from the model, you need to take a centimeter tape. To create a universal pattern, it is enough to determine 3 main parameters of the pet:
- ОШ – neck circumference. Measured at the base of the neck - where it meets the chest;
- OG - chest circumference. Calculate along the widest part of the cat’s body, under the front legs;
- DI is the length of the product. Equal to the distance from the base of the neck to the base of the tail.
Based on these measurements, you can design any styles of clothing for various purposes for your cat.
If the product involves sleeves and a collar, then the following measurements are also needed for the pattern:
- OT - body circumference. Measured across the stomach, in front of the hind legs;
- OPL and OPL are the girth of the front and hind legs, respectively. Calculated based on their widest part;
- LSH - neck length from base to ears;
- DT - length of the body between the front and hind legs.
When creating a drawing, length measurements are taken in full, and the length of the girths is divided in half. Armed with the numbers, you can safely start cutting out a costume for your pet.
Universal drawing
The figure shows an approximate drawing from which you can create various clothing patterns for cats.
The top image is the back, consisting of two parts. The lower part is the tummy. Half of the part is drawn, a fold runs along the middle line. Semicircular recesses are holes for the pet's paws (armholes).
The DI measurement is laid along the lightning line. Next, a drawing is built from it in accordance with the size of the cat. Line CD is the length along the tummy from the front to the back paw.
When cutting the product, remember that clothing for cats should not be too tight. To do this, add 1-3 cm to the pet's girth measurements for a loose fit.
Seam allowances must be made along the contour of the pattern. Their size is adjusted as follows: add 0.5-1 cm along oblique and figured cuts, and 1-2.5 cm along side and shoulder seams. Clothes for a cat should not be too loose.
Required Items
To create clothes for cats with your own hands, you need to prepare a workspace: a table or any flat surface for cutting.
You will also need:
- paper or fabric for making a pattern;
- yarn and knitting needles or crochet hook if the project involves a knitted item;
- fabric: main, lining, cushioning (insulation);
- tailor's chalk;
- adhesive materials for strengthening oblique and figured cuts;
- sewing accessories: buttons, snaps, zippers, Velcro fasteners;
- finishing accessories: braid, lace, adhesive applications;
- sewing threads;
- needle;
- scissors;
- sewing machine.
Now you can start creating an original, stylish set of clothes for your pet.
Comfortable and stylish pajamas
Cats are heat-loving animals, especially if you have a Sphynx living in your apartment. Pets with smooth coats require special attention, so comfortable pajamas are the ideal solution for caring for your four-legged animal. For overalls, any soft fabric is suitable, for example, flannel, fleece or knitwear; it is better to use waterproof options. The pattern of this outfit for a cat is printed on A4 sheets or applied independently to whatman paper.
Step 1. This model consists of several parts. Part 1 – back (GZ), the value is equal to the length of the cat’s back; you can also place a fastener along this line (for this you need to leave an allowance of two to three centimeters). Detail 2 (IZ) – belly measurement, folded along the IZ line.
Step 2. Place the pieces together and sew. The lines AG, BV, VD, DE are sewn together, the rest remain free (AB and EZh are the paws). The ZhZ line also needs to be sewn, but leave a small hole for the tail. When the work is ready, sew on a zipper if desired.
Some tips for sewing: make the seams overlap, using a zig-zag stitch, in this case they will be softer and will not disturb your cat. The lower edges of the paws and throat can be supplemented with a pre-prepared knitted ribbon. If the pajamas are made from fleece, the fabric does not need to be improved in this way.
Sweater for a cat
The Sphinx is an animal that has short hair, large ears like a bat, and is not always easy-going. But those who love this breed of cat know that they need to be kept warm at all times, because they are susceptible to cold. Therefore, it is necessary to insulate your pet if it is cold in the apartment or sometimes you take it out of the house. In this master class we will learn how to knit a cute sweater for your pet. For such a small product you will have to spend a little time, but then the cat or cat will be warm and will continue to delight the household for a long time.
Before we start knitting a sweater, we need to take measurements from the cat - length of the product, belly circumference, belly and back length, neck circumference.
Then we need to create patterns, which we can then use for further products for the cat. Knitting patterns are very simple, so even a novice needlewoman can handle it.
What we need to prepare:
- white wool mixture threads;
- red acrylic threads;
- knitting needles number 3;
- a needle with a large eye.
We start knitting from the collar. To do this, we put 71 buttonholes on the knitting needles with red threads and knit an elastic band, one front and one purl, to a height of seven centimeters. Now we divide the resulting fabric into two parts, where 25 buttonholes will be the stomach, and the remaining 46 will be the back. Now we switch to white threads and begin to knit with two balls, separately for the back and separately for the tummy.
1st row: belly - we knit all the buttonholes with knit stitches, while making 14 yarn overs evenly throughout the row. Back - we knit 23 buttonholes with knit stitches, then one yarn over and again with 23 knit stitches.
2nd row: we knit all the buttonholes purl on the back – that’s 47 stitches. Belly – 39 stitches are knitted with an elastic band one after another.
3rd row: tummy - remove the buttonhole, one yarn over, then again elastic 37 loops, and again yarn over and knit; back - remove, yarn over, knit 45, yarn over, knit. 4th row: back - purl everything; tummy - 41 buttonholes are knitted with an elastic band one after another. 5th row and 10th row: we knit the same way as the 3rd and 4th.
From the 11th row we begin to form armholes: tummy - close 3 buttonholes and knit 41 loops with an elastic band; back - close three buttonholes, purl the remaining 52 buttonholes. 12th row: back - close three buttonholes and purl the remaining 49; close three buttonholes, and then knit 41 loops with an elastic band. 13th row to 27th: we knit taking into account the pattern.
28th row: belly – you need to pick up three air stitches and then knit taking into account the pattern; back - three air and again taking into account the pattern.
The first stage is searching for patterns and preparing tools
If you are not a seamstress, don't worry. On the Internet, find a pattern for an outfit you like for a cat and print it out. Transfer all the details onto a sheet of paper in a box.
Cut out the blanks. Place them on a piece of paper that will fit the pieces in the right size for your pet. You can also use graph paper. Zoom in by adding the distance from each edge according to your measurements. Attach the resulting patterns to your pet.
Based on the measurements taken, a pattern is made. You can do it easier and use a regular sock. Here you need to put the sock and mark the holes for the paws with chalk. Afterwards they are carefully cut out. The result is a ready-to-wear product.
There is also a more complex scheme. In this case, using the measurements taken, a trapezoid is drawn with holes for the front legs. Here you need to correctly determine the location for the fasteners. This is how vests, sweaters and jackets are made. The latter products require sleeves.
The overalls are made using a more complex pattern. It consists of two parts (bottom and top) that need to be sewn together. Such products are complemented by zippers, pockets, and sleeves. The main parameter here will be the length of the back. The resulting value is divided by 8. The result will be the sides of the grid square where the pattern will be built. All dimensions must be carefully and accurately transferred to this grid.
Using these patterns you can easily make any type of clothing for your cat.
Final finishing
The vest is ready, now all that remains is to clean it of chalk lines, threads and iron it. Then we insert the cord into the hood and thread the end switches.
Executing the application
But that is not all! On the back I decided to make an interesting appliqué in the shape of a cat’s face. Such a small thing, but it’s already original and pleasing to the soul!
Cute vest for a cat
To build this model, you need to know the circumference of the cat's neck, the length of its back, the circumference along the bottom, and the length between the legs. If you want to use clasps, leave a small allowance for them.
Step 1. Mark the neck circumference measurement on a white sheet, but not with a straight line, but with a slightly rounded line. Exactly in the middle, draw a vertical line equal to the length along the back. The bottom part of the picture is the bottom of the product, its value is equal to the circumference of the cat’s lower body. Divide the “distance between the paws” parameter by 2, the resulting figure is the line to the beginning of the holes for the paws (on both sides of the vertical line). The dimensions of the vertical length of the vest depend on how long you want to give the product.
Step 2. Transfer the data to the selected fabric by attaching the pattern to it. Cut the resulting blank with scissors, then sew the product by connecting two opposite sides AB and CD. Cut out the piece, leaving a little space for the seam, then cut out the armhole for the paws, then hem or border the edges of the piece.
Ears and tail
Any black and white outfit, complemented by neat triangular ears and a long tail, can be considered a cat costume. In order to sew them you will need:
- black fabric (it is better to use any natural or faux fur);
- white fabric;
- PVA glue;
- scissors;
- threads, needle;
- cardboard;
- pencil;
- any filler;
- hair hoop.
Work order
Make a pattern for the ears in the form of two triangles. One is 0.5 cm larger on both sides and 4 cm on one.
Cut out one black ear and one white ear along them. Turn the pattern over and cut out a couple more ears.
Attach the white triangle to the wrong side of the black one and fold the black edges 0.5 cm on both sides. Place a cardboard triangle inside.
Mark the places on the hoop where the ears should be and wrap the remaining 4 cm of black fabric around them, dripping PVA glue inside.
Cut out the tail into two pieces.
Sew them together, turn them inside out and stuff them with stuffing.
Sew the tail to a belt or suit.
Choosing fabric for clothing
The right fabric is half the success. But first you need to decide:
- what breed is the pet;
- how old is he;
- what time of year the item will be worn;
- It will be casual wear, you need to go to a celebration or for walking on the street.
Any fabric has its pros and cons:
- Cotton and viscose will not cause allergies, are pleasant to the touch and to the body, and stretch well. But they wrinkle a lot, take a long time to dry and become deformed.
- Linen is hygroscopic, hypoallergenic, thermally conductive and capable of reflecting ultraviolet radiation. But when worn, such fabric is whimsical. It wrinkles quickly, after washing it often shrinks and crumbles in the cut area.
- Wool is a material of natural origin, characterized by excellent heat retention properties. One of the disadvantages is the formation of pellets during wear.
- Synthetic fabric at least wears well, dries quickly and stretches, and is able to quickly absorb all the smells and aromas of the surrounding world. It is electrostatic and quite often causes allergies in pets. You need to be careful with this fabric.
- A mixed material that has absorbed most of the positive qualities of natural fibers.
It follows from this that the material for sewing clothes for a cat must be of natural origin.
It is better not to take fabric that does not stretch well, as it will be uncomfortable for your pet.
Nylon, nylon, synthetic fabrics are highly durable and have the ability to retain the shape of the product for a long time, but can cause allergies
You should also avoid purchasing products that:
- has an unpleasant and pungent odor;
- wrinkles quickly;
- has an openwork base;
- takes a long time to dry after washing;
- crumbles along the edges of the cuts;
- rustles.
Depending on the season when the clothes will be worn, it is recommended to pay attention to the following material:
- winter: insulated stretch, knitted fur and raincoat fabric with water-repellent impregnation;
- spring: taffeta and raincoat fabric with water-repellent impregnation;
- summer: mixed fabrics consisting of cotton and viscose;
- autumn: microfiber, denim and water-repellent raincoat fabric.
Silk is most often chosen for formal wear.
The benefits of sewing clothes for your pet yourself
Currently, in the assortment of any specialized store you can find hundreds of product offerings. Among them are shoes for cats, accessories, as well as all kinds of clothing - dresses, shirts, cute suits, sweaters, etc. Particularly original owners can purchase superhero costumes, evening dresses, carnival dresses or business sets with ties for their cats. However, the cost of a good quality costume is quite high and not all categories of buyers can afford to purchase such a product just to pamper their pet.
The good news is that you don't have to visit a pet store and write out a hefty check at the checkout to get a smart new cat apparel. Good clothes for a cat can be made with your own hands. The easiest way to make a new pet is to follow the recommendations provided in the handicraft master classes, which can be downloaded online.
Advantages of sewing outfits yourself:
- cost savings;
- the ability to choose the design and materials for the manufacture of the product;
- exact suit size corresponds to the animal’s body structure and its individual needs;
- a chance to create a truly exclusive and unique outfit.
All these advantages allow pet owners to abandon the idea of buying clothes for cats in the store, and make them think about the opportunity to show their creative impulses in the process of sewing original clothing models to replenish their pet’s wardrobe.
Fabric cutting, fitting and sewing
Before cutting, the fabric needs to be washed and ironed to make sure how much it shrinks. In this case, you should definitely take this into account when sewing and select a slightly larger size than the animal needs.
The layout of the blanks is carried out on the fabric folded in half from large elements to smaller ones so that the direction of the grain thread becomes parallel to the edge of the fold.
Then do the following:
- secure the paper template with pins to the fabric and carefully trace the design;
- then cut out all the necessary parts, not forgetting the seam allowances;
- sweep them away with a bright thread and put the resulting clothes on the cat;
- If there are any problems, apply the markings necessary to correct them with chalk.
Well-fitted clothing items can be finally put together. First, fasten the upper, located on the back, and the lower, running along the stomach, halves of the suit. The seams on the sides and in the shoulder girdle are sewn with a zigzag stitch with flat overlapping stitches. The width of the armhole must be selected depending on the purpose of the item of clothing, narrowing it for a winter version of the suit, and widening it for a summer T-shirt.
Then you need to process the edges of the clothing. To do this, you can use a braid with an elastic band. It is attached from the front side with the same zigzag stitches, stretching it a little before doing so, so that the braid does not gather and compress the edges too much. This will not only prevent the edges from fraying, but will also be a nice decoration for your cat costume.
The last stage is sewing fasteners and accessories to decorate the costume. There are a large number of fasteners that you can choose from for your cat suit. There are several recommendations in this regard, but first of all it is necessary to take into account the breed of the animal.
The zipper is best for smooth-haired pets, otherwise the hair will get stuck in the mechanism. In the same way, hairs will linger on Velcro. Universal fastenings are buttons that can be placed either on the back or under the chest of the animal.
After completing all these operations, you will make a luxurious costume for your pet.
To sew a vest, you need to prepare the following materials:
- - textile
- - lining
- - snaps or buttons
- - scissors
- - chalk
- - threads
It is better to choose fabric from the costume group, with the addition of natural fibers (wool, linen). A brightly colored lining will look interesting.
The procedure for sewing a vest:
1. Before cutting, the fabric must be washed and ironed so that the finished product does not shrink or fade.
2. Print the pattern, enlarging it to the desired size, or transfer it from the pattern sheet Burda No. 5 2010, model 143
3. Fold the fabric right side inward and trace the pattern with chalk. We cut out the parts with allowances of 0.7 - 1 cm on all sides. It turns out 1 back part (one-piece back), 2 shelf parts. We cut out the same details from lining fabric. For the leaf, we cut out two strips of fabric 9cm long, 5cm wide plus allowances.
4. Fold the piece of paper right side inward and sew down the short edges, cutting off the corners next to the stitching.
5. Turn the leaf inside out and iron it.
6. On the shelves, mark the location of the pocket, place a piece of paper on top and stitch it in place; the stitching line should coincide with the line where the pocket is located.
7. We bend the leaf and secure its sides with a stitch 2-3 mm from the edges, iron it.
8. Fold the shelf and back with the right sides inward and stitch the shoulder sections at a distance of 0.7-1 cm. We also stitch the shoulder sections on the lining.
9. Finish the vest with lining. We fold the lining and vest with the right sides inward, matching the shoulder seams, fasten with pins and stitch along all sides except the side ones. In rounded places we cut the allowances with scissors.
10. Turn the vest right side out through the side cuts and straighten the corners.
11. Processing of side cuts. In order to stitch the side sections, we reach into one of them and pull them out. We sew the side sections together with the lining. On the other side we sew down the side cuts as much as possible, leaving the hole in the lining unsewn. Sew up the hole in the lining by hand.
12. We sweep the vest along all the seams, forming a small edging from the main fabric, bend it towards the lining, and iron the basted seams.
13. We install buttons on the sides using a press, or you can sew buttons and punch out loops.
14. Iron the vest and remove the basting threads.
You can sew trousers paired with a vest using this master class.
A vest is a wonderful and versatile garment in every sense. Making your own vest for a girl is a great idea! This master class will tell you step by step about a children's vest made of knitwear and fleece. As a result, you will quickly get a fashionable vest with your own hands, softly lined, with an applique and a hood. Sew an exclusive vest for your child, you will give irreplaceable warmth, care and attention.
You will need:
- Thick knitwear – 50.0 cm.
- Thin knitwear – 50.0 cm.
- Fleece fabric – 50.0 cm.
- Zipper – 40.0 cm.
- Threads – 1 piece in the color of the fabric, 1 contrasting thread.
- Tailor's pins.
- Sewing machine.
- Overlock.
- Needle for superstretch knitwear No. 70-75.
- Cord 50.0 - 60.0 cm.
- End caps for cord 2 pcs.
Sewing instructions
Let's start with how to sew a costume for a domestic cat with your own hands. The following instructions must be observed:
- Before starting work, the material is ironed. This will help assess the degree of fabric subsidence and determine the supply of material for seams;
- the paper template is fixed on the fabric folded in half. You need to go from large fragments to smaller ones and parallel to the shared thread;
- then the fabric is cut according to the previously created pattern;
- the cut out elements must be swept away with a bright thread. Now the resulting template needs to be tried on the animal and assessed how well it fits on it. If necessary, the markings are corrected;
- fragments of clothing that fit well together are finally sewn together. You can sew them on a sewing machine;
- First, the outer and inner sides are sewn together, and then they are combined into one product. All seams should face inside the lining. This way they will not rub the pet when walking;
- Next, the fasteners are sewn on. If a zipper is used, it is carefully sewn in at the stage of connecting the outer and inner parts of the item. It is only suitable for smooth-haired breeds.
Now you can try your creation on your pet.
Costume creation process
After the template has been selected, the owner will have the most important part of the work - transferring the patterns to the fabric, cutting and basting the blanks. To begin with, the master will need to cut out a template from paper, and then, using chalk and pins, transfer it to fabric
At this stage, it is important to leave allowances for the seams and pay attention to all the details, because otherwise the sewn costume will not fit your pet
After transferring the template to the fabric, you should cut the blanks. To do this, it is better to use special scissors that have sharp blades and guarantee a neat, even cut. When the blanks are cut out, the basting stage awaits. It's better to start from the wrong side. The sequence of basting the blanks must be carried out in accordance with the requirements of the patterns.
After the rough basting, having made sure that the actions performed were correct, the pet owner can sit down at the sewing machine and sew down the parts for finishing. It is recommended to grind down the largest parts first, and fasteners, buttons and eyelets should be sewn on last.
https://delaemrukami.boltai.com/topics/vykrojki-kombinezonov-dlya-domashnih-lyubimtsev/https://zverki.click/koshki/uhod-koshki/odezhda-dlya-lyubimyh-kotov-i-koshek-svoimi- rukami.htmlhttps://mechtakoshki.ru/uhod-i-soderzhanie-koshek/predmety-dlya-kormleniya-i-progulki/odezhda-dlya-koshek-svoimi-rukami-poisk-vykrojki-i-poshiv-kostyuma
Cute summer t-shirt
In the summer, a beautiful, stylish T-shirt will be ideal for your smooth-haired cat - but this model is most suitable for sphinxes, whose skin needs to be protected from direct sunlight. How to make a T-shirt for a cat with your own hands? First, prepare a light fabric, use knitted options. Draw the diagram yourself or print it out, cut it out and draw it onto fabric. Then proceed according to the instructions:
Step 1. As in the previous version, the GZ line is the length of the cat’s back. Fold the back (part 1) in two layers, cut it out, bending along the dotted line. Remember that the product should not interfere with the animal’s movement - if the cat is well-fed, make the pattern a little wider. Also cut out the belly (part 2) with a fold along the IZ line.
Step 2. Place the two parts together and sew along the lines BVD, AG. Use a zig zag stitch. Leave the lower part of the product, as well as the sleeves and neckline as is, but if necessary, the lower part and sleeves can be hemmed.
Vest without pattern
To sew a vest for a cat, it is not necessary to draw complex patterns. All you need is an old sweater, scissors and some creative inspiration. The model in the picture shows a dog, but the proposed accessory is perfect for a cat of any breed.
Clothing suitable for both cats and miniature dogs
The step-by-step production of such a vest is presented below:
- the sleeve is cut off from a knitted sweater;
- draw a curved line with chalk next to the cut - on the stomach the vest should be shorter than on the back;
- cut off the excess along the marked line and overcast the edge. You can use either an overlocked hand stitch or an overlock stitch;
- The future vest is applied to the animal and the location of the holes for the paws is marked. The closer to the narrow edge the holes are made, the smaller the vest collar will be;
- Having folded the sleeve in half, reflect the marks for the holes symmetrically and cut them out. You can overcast the edge in any way.
After fitting, the craft is adjusted. If necessary, it can be sutured.
How to tie things for a cat
You need to knit clothes for domestic cats according to the same principle as for people. You can knit and crochet. Based on the previously taken measurements for sewing the product, a pattern of the desired outfit is made and it is calculated how many loops there will be in a row. You can make several loops to determine your 1 cm step.
Sweater
A blouse or sweater is knitted in parts. First, the main part is knitted, to which the sleeves are then attached. With a vest, things are much simpler. Here it is important to correctly measure the waist circumference of the animal. You need to start from the front. If your knitting skills are weak, you need to use a simple pattern. Experienced people can take on more complex patterns.
cap
To knit a hat or beret, you need to measure the circumference of your head, the distance between the ears, and the distance from the back of your head to your forehead. Based on these measurements, a product pattern is made. Knitting is done according to the same principles as a hat for a person.
If you wish, you can sew or knit a wide variety of clothes for your pet: a dress, a sweater, a T-shirt and even a winter overall. The main thing is to take your measurements correctly and strictly follow the above instructions.
Cat size chart
To determine the size of the cat and select clothing, use the table below of standard sizes. You can also use it to determine the size of a small kitten. The table shows the average sizes of small, medium, large cats (L, M, S), and then each step changes by 3 - 5 cm.
Save the link to this article so as not to lose the cat size chart!
For Sphynx cats, the sizes will be different, since Sphynx cats do not have hair.
When purchasing clothes for a cat, we advise you to consult with the seller of the products or use the sizing instructions on the online store website.
Dress for a cat: we make an outfit with our own hands
To participate in exhibitions, tailed pets are well suited for a fashionable dress that can be created at home. This dress can be sewn using a standard pattern. Choose any soft-feeling fabric, the size of which should depend on the size of the cat itself.
Step 1. For the pattern you will need the length of the cat's back. Divide this parameter by ten - the resulting figure will be equal to the size of the cell. For example, with a back length of 20 centimeters, you will get a square with sides of 2 centimeters. Make a line on a piece of paper, place the sides and bottom there (as shown in the picture). Take into account all the edges and carefully count the number of squares so as not to make a mistake.
Step 2. You should have three parts - two sides and a bottom. Cut out the sides and bottom, then sew them together. The incision is present only on the upper part, which is located on the neck.
Step 3. Sew on a beautiful decorative button if you want to further decorate the dress.
Don't make the dress too tight, especially if the fabric is non-stretchy. Also, the animal may become confused in its movements if the dress is too loose. You should not think about making a dress that is too fluffy - such options are only suitable for holidays or exhibitions, during which the cat will not be able to move, but will sit in one place.
When making a holiday suit, you can sew it from a new beautiful fabric, and for daily wear you can use an outfit from old things. Your cat will find it easier to accept things that smell familiar.
Types of suits
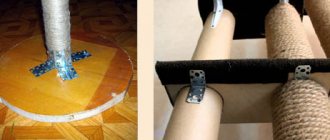
DIY cat scratching post: options at home
Clothes for cats come in different varieties and are divided according to their appearance and purpose. Therefore, when choosing suits, it is recommended to take into account the purpose of use and some features.
For many cats, clothing is a way to protect themselves from the cold.
Winter
Winter clothing is designed to protect pets from freezing and hypothermia. Insulated overalls are well suited for this purpose - a one-piece suit with cutouts for the head, tail and paws. You can choose a good warm jacket that covers most of the body. For those cats whose paws are cold, it is recommended to choose insulated soft boots and socks.
Demi-season
Demi-season clothing is used in autumn and spring
At this time of year there is quite often rain and slush, so you should pay attention to the quality of the fabric. It should not allow moisture to pass through, but at the same time breathe well.
Important! Demi-season suits should be easy to clean
Summer
Clothes for the warmest season should be made of light and natural fabrics that are well breathable. These outfits are used to protect the animal's delicate skin from sunburn. A properly selected outfit will also allow your pet to avoid overheating in hot weather.
Casual
Casual outfits are required for cats that lack warm fur. Such animals often get cold even on cool summer evenings, so they need suits to avoid hypothermia and get sick. It is recommended to choose clothes made from natural fabrics so that your pet feels comfortable.
Festive
Clothes for holidays are usually very elegant and original.
Interesting costumes are used for exhibitions and competitions, thus often attracting the attention of judges. Such outfits are made from beautiful fabrics and decorated with lace, embroidery, rhinestones and stones.
Dresses for exhibitions are always distinguished by an abundance of decorative elements
Protective
Items from this group are great for protecting pets from harmful insects and ticks. They also need to be treated with special products, but wearing such clothes for a cat significantly reduces the risk of bites from fleas, ticks and other pests.
Decorative
Decorative clothing, like festive clothing, is required only in certain cases - exhibitions, holidays. In most cases, cats don’t particularly like it because it is not soft and cozy, but has a lot of decoration. But cat owners still use these things in some situations.
Important! Before buying cat clothes, you need to decide on the purpose of its use, and then consider the options. You can also decorate a cat for a holiday
You can also decorate a cat for a holiday
Step-by-step instructions for creating crochet sweaters for cats
A convenient guide that will allow you to quickly make a new and very warm thing for your beloved family member.
Schemes are provided for each model and convenient step-by-step production.
Red crochet sweater for a cat
A very bright model for a bright nature. Decorates and warms your cat. The model is fitted, stretches and does not restrict movement. There are fasteners (buttons) along the back , so putting on and taking off will be easy and not scary.
To work you will need:
- 100 g of natural wool yarn;
- hook number 3.
Scheme 1
This blouse is knitted in square fabric. Next, buttons are attached and small sleeves are knitted in the armholes.
Scheme 2
The model should be created step by step like this:
Canvas to armhole
Crochet 48 air loops, this is exactly how the jacket will be around the circumference . Next, lift in three loops and do the first 2 rows according to pattern number 1. These are simply double crochets in each lower element of the row. Then go to pattern number 2. It is very similar to the previous one, only one air loop is now added between the columns, and the columns themselves will be knitted between the columns of the previous row. Knit 6 rows like this. After each row, decrease 2 columns (one from each edge).
Armhole
For armhole cuts, you need to knit the middle 6 stitches according to pattern number 1 to a height of 6 rows. Next, step back from this protrusion two elements to the right and left and alternately knit identical rows (6 pieces in total). Then combine into fabric and knit a collar.
Gate. After the armhole is completed, knitting continues according to pattern number 2. In every second, decreases of 2 stitches begin again, in the same way. It is necessary to knit 3 rows according to the given pattern. Next, go to pattern number one and knit 2 rows, but there will be decreases in each row of two stitches along the edges.
Sew buttons. The model requires three buttons on the back . For them, knit three loops along the edge of the fabric, not too loose so that they do not unfasten.
Sleeves. Cast on loops along the edges of the armholes under the sleeves and knit 2-3 rows with single crochets without increasing or decreasing. They shouldn't turn out tight.
Here is the finished product. Despite the fact that the sweater was not knitted in the round, it does not require assembly . Just fasten the buttons and the cat can frolic and not be afraid of the frost.
Round fabric lounger
A soft small mattress will become a universal bed for cats. Many pets like such sleeping places. Thanks to the sides, it is possible to enclose the space and better retain heat inside the kitten bed.
With high sides
Even inexperienced needlewomen can make a cat bed with their own hands, and step-by-step master classes will make the work easier. All you need to do is prepare a pattern (you can find it on the Internet and print it out). The main thing is to take accurate measurements so that everything is done symmetrically.
So, do-it-yourself cat bed, step-by-step instructions:
1. To begin, fold two layers of thick cardboard, draw 2 circles (to do this, you can circle a round object, for example, a dish), and then connect the figures into an oval. The base is cut out with a utility knife and cardboard templates are glued together.
2. Next, the workpiece is outlined on a piece of foam rubber and cut out. After this, you will need to cut one side from 6 to 8 cm in height from a sheet of cardboard. It is glued to the cardboard base so that it covers the sides and back.
3. The next step is to cut out an oval from the material, which will be slightly larger than the workpiece itself. The foam rubber is wrapped in fabric and gathered with threads. The folds are distributed around the circle of the cat’s sleeping area, so that they are as even as possible.
4. Then a small piece of material is inserted inside and stitched. Afterwards, cut out the foam back. Next, prepare the fabric based on the template, glue it on both sides using hot adhesive and manually sew the bed for the animal along the edges.
5. You also need to cut a piece that fits the size of the base and fix it with PVA glue. The cut is pulled together from the reverse side with threads.
To strengthen the base, you need an additional oval blank, which will be slightly smaller than the bottom. Glue is applied to it, and then fixed on the reverse side. A pillow is placed inside the pet's bed.
With low sides
To make a cat bed with your own hands, first mark on the fabric and cut out elements for sewing covers: internal and external.
Their parameters are equal to the size of the cat + 20 cm, which is allocated for the lining of the low sides.
When cutting, seamstresses are advised to immediately fold the material into 2 layers in order to cut out both elements at once. After this, the craftswoman cuts out a circle from the foam rubber sheet, the diameter of which is equal to the diameter of the cover, excluding the sides. The foam rubber is placed on the wrong side of the outer cover (in the middle), and on top is a blank for the inner one.
The elements are pinned, their position is fixed, then the cat bed is sewn together and stitched in a circle. After this, lines are drawn for future seams. To sew such a bed for pets, 4 lines every 45° are enough. They are made along the entire diameter of each cover so that compartments are formed for the filler. Each section of the sides of the cat bed is filled, and then the filled cells are compacted. The edges of both covers are connected, swept, and gathered. To process the sections, hand or machine stitches are used.
Video “Clothes for cats”
This video shows how to sew a cute T-shirt for a cat with your own hands, and also gives useful practical tips on sewing clothes yourself.
Many owners from time to time dress up their beloved cats in a variety of cute and practical clothes. Cats in cool clothes are the new rage. You can create clothes for a cat yourself - it’s easy, interesting and doesn’t require financial expenses that hit your wallet.
Together with your pet, you can realize the most unusual ideas and ideas, and also turn creating clothes into a real hobby!
Who needs a suit
Nature has taken care of the comfort and warmth of most cat breeds.
Even before birth, animals acquire a soft and durable coat that performs essential functions. This includes thermoregulation and protection from wind, moisture and other weather conditions. But certain breeds are less fortunate in this regard. This is especially true for artificially bred ones, whose fur is presented in the form of a barely noticeable fluff. These breeds are completely devoid of even minimal “plumage”. From a hygiene point of view, the creation of hairless breeds has become a lifesaver for people suffering from allergies. However, the cats themselves had to pay for the hypoallergenicity. Their body temperature is most often elevated, and the animals themselves are constantly looking for somewhere to warm up. A way out and salvation for freezing animals will be clothing for cats, which you can sew with your own hands.
What breeds will need clothing:
- Sphinx;
Sphinx
- Devon Rex;
Devon Rex
- Bambino;
Bambino
- Peterbald;
Peterbald
- Levka.
Levkoy
Woolen pets do not need clothing. However, some owners prefer to dress up their pets in interesting costumes. Well, if the outfit doesn’t bother the cat herself, then why not?
Sewing blankets from improvised materials
Below we will describe how and from what you can make a blanket if you don’t have any suitable material or patterns at hand. You don't need any special cutting and sewing skills.
You may be interested in Altering a skirt onto a dress and vice versa: sewing it yourself
Scheme of overalls for a cat
Pantyhose blanket
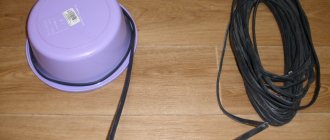
The simplest option, which requires virtually no resources. There is only one rule: you need to use clean tights, since the animal definitely needs sterility after surgery and sterilization. It is recommended to use thick tights that will fit the cat's body well.
Important! The blanket is made like this: a piece of trouser leg 20 cm long is cut off and pulled over the cat’s belly. Additionally, you can make holes for the paws.
New Year's suit for the British
Sock blankets without ties
The product is made from socks or stockings in the same way. Find the perfect size sock and cut off the front to create a fabric tube. The cat's body is inserted into it, fixing its stomach.
For your information! The most remarkable thing is that even if you don’t have the appropriate sizes at home, you can always buy clean and new socks at any clothing store for a few tens of rubles.
Cat blanket from a baby bodysuit
Blanket from old children's clothes
Old children's clothing in the form of jumpsuits and vests also works well. You should choose something that fits comfortably on your body and is fixed on it. If you don’t have anything like this at hand, then you can make a blanket from an ordinary sleeve of a children’s jacket that stretches well.
Fashionable outfit with a hood
Towel blankets
The most common option involves making it from a simple cotton towel. A cut of the required length is made, and holes for the paws are cut out, based on the anatomical features of the cat. Holes are cut in it for the neck, paws and sometimes the tail. The final stage involves creating a cylinder by sewing the ends of the towel together or sewing on strings.
If the cat is to be sterilized, then you need to buy a blanket
How to choose a cat costume in a store
Clothes for four-legged pets can be bought in the store. The retail chain offers a wide variety of cat apparel. The most common among them:
- One-piece overalls with a cutout for the head, paws, and tail. This walking suit retains heat better than others.
- An autumn-winter version of jackets that cover the main part of the body.
- Sweaters, vests. You can knit such things yourself using patterns, of which there are many on the Internet.
- Shirts, pajamas, T-shirts. They are worn in spring and summer, when dangerous ticks are especially active.
- Accessories, including: blankets, hats, socks.
The cost of clothing for tailed animals ranges from 140 to 1500 rubles. Costumes for exhibitions and holidays can cost more than 2-3 thousand rubles.
Specialized stores have a large assortment of cat clothing and accessories.
In stores you can buy sets of clothes of different sizes, including for kittens.
Material selection
The material is of considerable importance when choosing an outfit for a cat. Autumn overalls can be made of smooth satin, thin fleece and have a lining. Sweaters are made from wool (usually rabbit, but preferably angora). The material for all kinds of blankets and hats can be linen, chintz, and cotton.
Clothing made from natural wool warms a cat well, but it should not be itchy, so choose outfits made from rabbit or angora down.
You need to choose things with a small number of seams, there should not be many buttons or zippers. Many accessories can rub the animal’s skin, cling to the fur and cause inconvenience, especially for active cats during movements.
How to choose the size
Knowing the right size will make the task much easier. Large and small clothes are equally inconvenient for your pet, and he may simply refuse to wear them.
Are the clothes comfortable?
Any outfit should not cause inconvenience to its owner when worn. To check this, you need to run the wrong side of the product over your cheek. If the clothing does not cause any irritation, then it will suit the cat.