A playing complex for cats made of cardboard is a cheap and environmentally friendly toy. If animals have their own place where they can climb and have fun, then they will not have the desire to cause chaos in the rest of the apartment. To create an area for your pet, you just need to stock up on packaging containers (you can ask for them in stores, use existing boxes left over from household appliances or parcels), scissors, glue and patience. All cats love to climb into boxes, so there is no doubt that they will appreciate the owner’s efforts.
- Step-by-step instructions on how to make a maze out of boxes
- What might a cat corner include?
- Schemes and options for playing corners made of cardboard
- Video master classes
- Recommendations for creating play areas according to the age of the cat
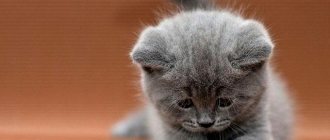
- Ideas for making kittens out of boxes
- Features of creating play areas from cardboard for cats and cats
Materials and tools
You need to prepare the cardboard box itself for work. It will be great if you choose a product that is not very thick, because otherwise the cat will not be able to reach the toy placed inside with its paw.
In addition to the long flat box, you need to find several more pieces of cardboard, from which you can subsequently cut out reinforcing strips. Prepare a ruler, pen, scissors and knife, glue and an object (such as a ball or treat).
It couldn't be simpler
The easiest option is to make a cat toy out of paper.
To do this, we only need a piece of plain paper and a strong thread. Step one: crumple up the paper, making a small ball out of it. Step two: wrap the paper ball with strong thread, leaving a small tail. Step three: demonstrate the impromptu catch to the cat by shaking the string.
Such a toy, of course, will not last long, but it is an excellent option when you need to quickly keep your kitten busy with something, spending a minimum of money and effort.
You can not only make balls from paper, but also cut out various figures, or simply connect several paper strips of different colors together.
Related article: Learning how to make dolls with your own hands using photographs from fabric
Hole layout
Draw a line in the middle that will run along the length. Then measure several equal lengths along the edges.
Connect the transverse lines (connecting the points on the sides). You can draw one more line along both sides (parallel to the central one). Then the intersection points will be your future holes.
Bright pink and softer: a selection of spring looks in trendy colors 2021
How to make a beautiful frame for any mirror: rope and foam rubber will come in handy
The song from Belarus for Eurovision 2021 broke the record for the number of dislikes: video
If you want to make a different pattern, don’t be afraid to limit yourself in your imagination.
The main thing is that you leave the middle intact (there should be no holes in it).
When all the points are marked, draw circles. The center of the circle will be at the points you marked. You can use a compass or round objects that suit your diameter for this purpose (for example, tape or a glass).
Why is it needed?
The presence of a labyrinth improves the pet's mood and helps train natural instincts.
Cat mazes perform tasks of the following nature:
- make the animal’s stay in the house more comfortable;
- keep the fluffy healthy;
- improve mood;
- train instincts.
The main goal of toys for cats, in particular interactive ones and labyrinths, is to develop a hunter in your pet.
Due to living in a closed space, they become less mobile and lazier, which affects the health of cats. They need to keep fit through physical activity. Also, such an invention helps to entertain the animal when the owners are not at home and it lacks attention. It can serve as a kind of house for a cat, in which he can hide to relax or if he wants to be alone.
Cutting holes
Now you need to cut out the holes. To do this, take a sharp knife, make a puncture, and then carefully pass it in a circle. If it is convenient to use scissors, do what is easier. Since the holes will most likely be small, you can use small scissors. Pay attention to the edges of your holes.
How to ask for help correctly: what to say so that you are not refused
Who is Manizha: what did she sing before Russian Woman (video)
Spectacular images with neon, or How to be the brightest this spring
If they are sharp and uneven, sand them down so that the cat does not get hurt. A great idea would be to paint the box in a color that matches the interior of your room. Firstly, it will be more attractive (no one will even guess that you made the toy yourself), and secondly, you will paint the edges, and they will become smooth and safe for your pet.
Pipe
So, what kind of design is this? This cat toy is a type of educational toy; it is a closed tube with holes the size of tennis balls. There are several of the same balls inside. The cat enjoys playing with them, rolling them around and trying to catch them out of the pipe.
Making a toy
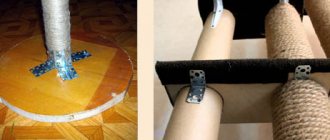
You need four plastic sewer pipes, more precisely, pipe corners with a diameter of about 20 cm, as well as a flexible plastic tube (cambric type) to secure the cut holes and improve them.
Wrap two or three turns of electrical tape around the narrower edge of the pipe. Cut two holes in each corner. We connect the pipes, tightly fitting each other into a single structure.
- On the cambric we make a cut lengthwise and tighten each hole, we get holes that are safe for the cat, into which you can climb with your paw and play.
You can also put crumpled paper candy wrappers into the toy; tailed pets play with them with pleasure. True, you will have to collect garbage around the apartment more often. Such a toy for a cat can be bought ready-made in a store, but its cost will be more than 10 times more expensive than one made by yourself.
Homemade cat toy. Cheap and easy homemade cat toy
Cats love to play - everyone knows that. DIY cat toys are a good idea. One of their favorite games is to push a ping pong ball under the sofa and try to fish it out from all angles. So the idea arose - why not make such a toy - a cat and a mouse (game under the sofa).
There was only one question - how to make sure that the toy could be returned from under the sofa. After all, the balls roll very far and eventually get lost. There was one more question: to make your own “sofa” for a cat, which, while playing, clings to the fabric with its claws (and, accordingly, spoils the sofa itself).
A toy mouse and a return mechanism are used as a running mouse. The return mechanism is a metal tape measure, it can be bought for 100 rubles. at any newsstand. Do-it-yourself interactive cat toys in pet stores cost the same as toys for children (a lot). We will do no worse.
It was decided to make the cat's own sofa. A piece of chipboard, knocked down in the shape of the letter P, was used as a sofa.
All that remains is to cover it with carpet. A cardboard cylinder from toilet paper is used as a holder.
A mouse pulled from under the sofa comes back, which forces the cat to pull it out from under the sofa over and over again.
Here is the finished toy - a cat and a mouse under the sofa. The most important thing is that it can also serve as a scratching post for your cat.
Pet owners should remember that cats need attention and care. Original and exciting mouse toys will delight any cat. You can make such toys yourself from scrap materials.
Moreover, if you choose colorful and bright materials, then such toys will be able to overcome the apathetic mood of even the most boring and clumsy cat.
After all, if the cat is bored, and at the same time she is an active lady, then she will try to bite you once again on the hand or leg, and run around the entire apartment. Such toys will help solve the problem of boredom for a long time.
In this case, it is completely useless to purchase expensive toys; as practice shows, most often expensive toys only last for two to three days. Therefore, you can make many similar toys, diversifying them with your imagination.
For work you will need the following materials:
- beads for eyes
- pattern
- cotton wool or padding polyester
- the fabric is varied, preferably bright, it can be cotton, wool, etc.
- needle
- threads
- laces
- iron
- scissors
We cut out a pattern from a piece of fabric according to the template.
First you need to cut out one side part, and therefore one bottom part. The fabric can be chosen in different colors and textures, so the side can be one color and the bottom another. Then we can turn the template over and cut out the remaining parts.
- For the ponytail, we need to outline a rectangle on fabric measuring 2.5x10 cm and cut it out; you can also use a simple lace for the ponytail.
- Now you need to make the ears, cut them out of the fabric and apply the two parts for the ears to each other with the wrong side.
If we make the tail from fabric, then you need to fold the rectangle in half lengthwise and fasten it with a seam, leaving an allowance of 5 mm. The ends of the strip should not be sewn together to turn the tail out. Now you can start sewing together all the parts for the mouse body.
We attach the parts to each other and stitch them, do not forget that you need to fold them right sides together, with an allowance of 5 mm, then leave a hole on the back so that you can then stuff the toy with padding polyester.
We turn it inside out and stuff it with padding polyester, insert the tail into the hole, sew everything tightly with a hidden seam and tie the tip of the tail with a knot.
We take the ears, fold the parts for them in half and sew them to the body with small stitches. It is recommended to make the eyes with a line stitch, but you can also sew on beads, but it is worth remembering that these are small parts and they must be sewn securely; if you are not sure, then just make a line stitch. Now the mouse toy is ready.
HAND MADE Mouse for cat
Simple DIY cat toys are a good idea.
In order to please and entertain your cat, you don’t have to spend money; we’ll show you how to make a heart-shaped mouse stuffed with catnip and other toys for your pet from available materials. To prevent your cat from getting bored and spoiling his home environment, make several toys for him with your own hands.
A little about the herb catnip (catnip)
Why do most cats love catnip grass so much? Veterinarians say that catnip is a cat's stress reliever. Now many products are produced for cats using this plant: various sticks, balls, toys. There are even drops that are used to drip onto the scratching post - this is how the cat gets used to sharpening its claws and not damaging the furniture.
If the cat has no appetite, catnip is recommended as a food supplement. Add a pinch of dried or fresh herbs. Catnip is also an anthelmintic. Catnip is sold at any pet store; you can plant it at home in a pot. At the same time, you need to make sure that the cat does not eat it all at once, and there is no doubt that he will like it.
On video: why cats love catnip.
From any piece of fabric, leather, or suede you can make this heart-mouse for a cat. This toy can be filled with different “fillings” - you can take dry catnip, chamomile, wheatgrass, barley, oats.
You cannot take plants that are poisonous to cats: datura, wormwood, hogweed, henbane, poppy.
If you stuff your mouse with fresh grass, collect it away from the roads, in a clean area, and be sure to wash it in water and then dry it with a napkin.
So, we have decided on the filling, all that remains is to sew the mouse itself. You can sew several mice for your pet and fill them with different herbs - then you can determine exactly what attracts your cat more. We offer you our master class on sewing a mouse step by step.
To work you will need:
- Fabric (small pieces).
- Grass.
- Sample.
- Needle, scissors, thread.
- A stick or pencil for stuffing the “mouse”.
- Tailor's pins.
- Rope.
- Thick needle.
We print or draw the toy pattern by hand. The dotted line indicates the line along which we will sew 2 parts. Using two points - the place that we are missing - we will turn the toy inside out through it.
Strengthening
If you leave the box without reinforcement, there is a risk that your cat will simply fall through and ruin the toy you made. Not every cardboard, especially one with holes, can support the weight of a pet. Therefore, you need to cut out several strips of cardboard. Their length will correspond to the length of the box, and their width will correspond to its height. After cutting out the strips, glue them together and wait until they dry completely. If you have very strong cardboard that is guaranteed to survive the weight of your pet, one strip will be enough.
Singer Aziza lied to her young groom because of filming the show “Mask”
Novovoronezh authorities have chosen a new monument to Alenka
The smell of sweat will no longer bother you: we prepare deodorants from essential oils
Check if it fits easily vertically in the center of the box (you marked the middle longitudinal line there). Then apply glue to the edges of the strips on one side and the other, insert them into the box and wait until completely dry. Don't be afraid to smear the glue, because after drying it will be safe for the cat, and no one will see the inside of the toy.
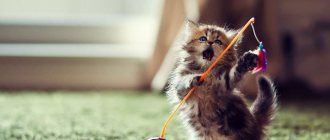
Fishing rod with bait
With such a toy, you practically won’t have to wave your arms, since the “game” on the elastic band will jump back on its own after the kitten catches it.
For production we will need:
- feathers;
- a small plastic box for shoe covers (you can use a Kinder Surprise box);
- thin hat elastic;
- three sushi chopsticks;
- twine or thick twine;
- miniature bell or bell;
- a little braid;
- super glue “Moment” or glue gun;
- golden acrylic outline;
- drill with 3 and 7 mm drills.
Open the box, drill holes: a little smaller in the lid, a little larger in the bottom.
Then we take small feathers of different sizes and connect them together using strong threads, securing them with several knots. Feathers can be purchased at handicraft stores or asked from friends who raise poultry.
Article on the topic: Painting eggs with wax: master class at home with photos and diagrams
We insert a bunch of feathers into the hole in the bottom and fill it with glue from the inside, wait for it to dry.
Then we thread one end of a piece of hat elastic into the cap and secure it with a knot. The length of the elastic band should be about 30 centimeters. Next to the lid we string a small bell on an elastic band.
We firmly glue the parts of the box together and let the glue dry completely.
After this, we measure our box and cut out a small rectangle of fur according to size. We wrap the fur around the box, fix it with glue, and make small oblique cuts at the ends so that it is convenient to stick the fur onto the rounded parts.
We cover the bottom of the box with tape. To give the toy a more aesthetic appearance, you can paint the elastic band and the bell, and also decorate the braid with a golden outline.
Place the sushi sticks as shown in the photo and fix the structure with glue:
Next, glue the tip of the twine at the junction of the sticks and glue it on one side of the fishing rod. The other end can be painted with acrylic paints or left as is.
Completion of work - glue the free end of the hat elastic to the fishing rod and wrap the joint with twine, fixing it with glue.
The fun is ready!
Preparing for the game
Now all that remains is to place a toy in the form of a ball or an easily rolling object in a cardboard box, close it on one side and leave the other open (there is an option to open both sides, this will be easier for the pet, and then make it more difficult by closing one of them). If you put a treat in a box, your cat will probably be able to smell it and take the initiative to get it. If it's just a ball, "introduce" it to your cat (let him sniff it or sprinkle it with cat mint). Teach him how to use a puzzle, it will be an enjoyable pastime for him.
Found a violation? Report content
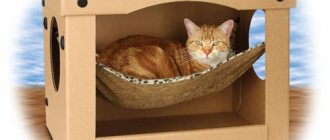
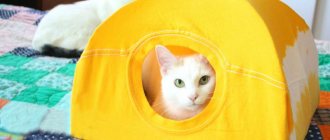
How to decorate a cardboard cat house. Decor ideas
To make the cat house more cozy and cute, you need to put in a little more effort and decorate the cardboard box yourself. To do this, you don’t have to run to the store, because most of the decorative parts can be found at home.
By the way, finding and making decorations for the house can become another little adventure and interesting activity, both for the owners and for the curious purr.
Here are some design ideas:
- Using a thick needle, you can sheathe the house with fabric: completely or just inside, or in separate areas.
- Glue white paper to cardboard and decorate it with cute images.
- Using the same principle, the box can be covered with wallpaper, beautiful napkins or newspapers.
- You can use a variety of stickers, if available. By and large, anything that can be glued or sewn to a box can become an element of decor; use your imagination and trust your creative impulse.
- Soft toys will help you make a cardboard cat house a center of tenderness and comfort: select several pieces and place them inside the house, near it, or glue them to the walls of the box.
- Glue a rope that your pet likes to play with to the ceiling of the house, inside or outside. You can also tie a rustling candy wrapper, paper or a toy that the cat plays with to the rope.
- A scratching post near or inside the house will make this place more attractive for the cat and protect the furniture from damage.
There are many options for a cat house: from the simplest, which will take no more than five to ten minutes to make, to very intricate ones, with a variety of decorative elements, second floors and towers. However, regardless of the complexity of the house, for each owner the satisfied face of his beloved purr is the best reward for the efforts expended.
Of course, you can purchase a ready-made house, but the manufacturing process itself will be fun for family members and pets who want to participate in the process. In addition, making a cat house with your own hands from a cardboard box is much cheaper than buying a ready-made one. You will be confident in its quality and will be able to show your creativity.