Everyone loves cats when they snuggle up on the couch, snuggle up, or purr on their laps. But no one likes cleaning cat hair from clothes and repainting torn joints. Today we decided to tackle one specific problem - the tray that constantly catches our eye. The master class will be especially useful for those who, due to the layout of the house, are forced to place the cat litter in a prominent place.
You will need:
- Plywood with a thickness of 12 to 15 mm for the walls of the house.
- 4 cm wide boards for the roof (about a meter in total).
- Nails and hammer, screws and screwdriver.
- Wood glue (PVA).
- Jigsaw.
- Miter saw (or hacksaw).
- Drill.
- Roulette.
- Two small furniture hinges.
- for the door.
- Sandpaper.
- Tracing paper.
- Masking tape.
- Dye.
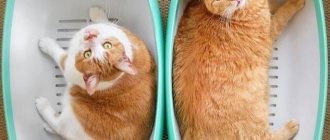
Cat toilet - how to organize it correctly?
Cat litter is one of the most important tasks for a pet at home. The right litter, a comfortable place and toilet training for your pet play a big role in organizing home comfort. It’s easier if you can take your pet for a walk, but even here it’s important to organize the walk properly, taking into account the terrain.
Fillers for trays today are varied:
- these are granular clumping and non-clumping clay fillers,
- sawdust, shavings, plant husks,
- sand,
- paper fillers,
- flavored and unflavored fillings.
The choice, of course, remains with the pet, who may be picky.
Reasons why a pet does not use the litter box or makes a mistake
:
- the pet is sick or getting old,
- the owner replaced the usual filler with another one, the owner updated the tray, the owner cleans and washes the tray with a sanitary product with a subtle odor, but the animal is sensitive to the smell,
- the owner has rearranged the house and the animal does not know the way to the tray,
- stress in the animal from the presence of new family members, guests, other animals.
The choice of litter for the tray should be considered. Clumping granular litters are convenient because they do not need to be completely changed, but only remove the lumps formed by urine and add new portions of the filler. Make a complete replacement, for example, once a week.
The smell of shavings and plant components can repel animals, as well as flavorings.
What is convenient for the owner may be unacceptable for the animal.
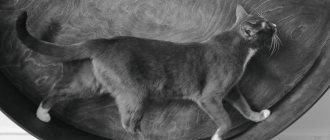
The shape and dimensions of the tray also matter. There are closed and open trays, but not every animal will use a closed tray (this is not an acquired taste). The height of the side of the litter tray matters. For some animals, the edge may be higher than necessary and create trouble. The width of the tray should allow the animal to dig around in the tray if it is accustomed to doing so. Messiness in the litter box may be caused by insufficient space in the litter box, and not by the pet's lack of neatness.
Auto-flush toilet for a cat
Cat on the toilet Now on Aliexpress there are many devices sold that help train a cat to use the toilet and, if you don’t pedal the training, in 1 - 3 months almost any cat can master this simple trick. Refusal of the tray and litter is a very useful step in creating coziness in the apartment, but this action lacks completeness - the cat does not know how to flush the toilet after itself. This problem is solved by the electromechanical device described below.
Why do you need to flush the toilet?
Coming up with a device capable of flushing the toilet after a cat is good from an aesthetic point of view, but there is also a practical need. Previously, when I left the apartment for a day or more, I placed an additional tray with litter next to the toilet, since my cat is a clean animal and will not use a dirty toilet again. Automation of toilet flushing made it possible to completely get rid of the tray and filler. Now, if the cat is given more food, he can live in an apartment alone for a long time without any help from humans (this is very convenient, but I still think that cats should not be left alone for more than 2 days, since despite the ostentatious independence, they are quite social animals and after a couple of days of loneliness they become depressed).
Technical task
What is needed for auto-flush devices? In general terms, the automation must somehow detect the presence of a cat on the toilet and, after that, somehow pull the toilet flush valve. The first point is much more difficult to implement - existing sensors cannot distinguish the size and shape of moving objects - how then can you distinguish a cat from a person? The only possible way is by behavior - the cat usually takes a long time to prepare, does its business, then scrapes the trestle bed with its paw for a long time and, as a result, spends several minutes on the toilet and, most importantly, never pulls the toilet flush handle itself.
Therefore, the logic of the system’s operation was supposed to be as follows - it monitors the presence of the cat on the toilet, then waits about 30 seconds, again detects the presence of the cat, then notes its departure and then waits another 3 minutes, tracking the movement of the toilet handle (this is not difficult to do, for example, using reed switch and magnet glued to the flush valve). If no one pulled the water drain during this time, the automation, using a servo drive, raises the drain valve for 5 seconds, and initiates the release of water.
This operating algorithm distinguishes a cat from a person and is quite well protected from accidental activations - the auto-flush will not work if a person briefly goes to the toilet (for example, to get a mop).
General design and mechanical part
In my toilet there is a completely ordinary earthenware toilet with a handle on the lid. I replaced the old Soviet mechanics a long time ago by installing a German faucet and flush valve.
Toilet cistern without automation
As you can see, there is relatively a lot of free space in the cistern, so I decided to place the entire automation system inside the cistern, mainly so that it does not attract attention. I don't want to explain to every guest why this device is needed and what it does. I used a homemade homemade CNC machine to cut mechanical parts and fasteners. I made the parts from soft sheet materials that I had on hand at the time - I cut the frame from a polyethylene kitchen cutting board, and supplemented the toilet valve with a horizontal platform cut from carbon fiber sheet. This platform transmits the servo drive force to the valve and prevents the valve from rotating around its axis. Lifting the valve by the servomotor and the handle are independent of each other - the toilet can be used as before, by pulling the flush handle, and the servomotor raises the valve, also without lifting the handle.
Toilet cistern with flush automation installed.
I will not go into detail about the mechanical design details here. Toilets are different, some have a handle, others have a button, each home craftsman has his own materials and ability to make mechanical components, so it hardly makes sense to copy the geometry of my device. The main thing that needs to be achieved here is that the mechanics must be reliable and durable, otherwise this whole undertaking makes no sense.
Electronics
How to spot a cat on the toilet? I experimented with different motion sensors. The Doppler microwave radar (this device opens sliding doors in shopping centers) proved difficult to set up and unstable, so I used an infrared pyroelectric sensor (often used to automatically turn on lights in entrances). Although this device is quite complex and is actually a thermal imager combined with an image analyzer, such pyroelectric sensors have long been commonplace, they are all more or less the same type and usually cost a few dollars each. I used a miniature Grove mini PIR motion sensor based on the S16-L221D. It does not have customization elements, but you can add them by following the instructions. To adjust the sensitivity, I soldered a trimming resistor to it and also slightly increased its performance by shorting the resistor on the board. This sensor can be replaced without loss of functionality with a larger and cheaper analog ZRD09 - it already has adjustable potentiometers for adjusting sensitivity and speed. I placed the infrared sensor outside the tank, on the side of the toilet at a distance of about 30 cm, placing it in a small box, also covering the wires with a plastic box.
Infrared sensor placement
To lift the toilet valve, I used a JMT 20 marine servo, which the manufacturer claims is somewhat waterproof. This servo is relatively powerful and comes with a metal “arm” with additional holes.
The “brain” of the device is the popular Arduino Micro controller. I placed it in a plastic box. External devices - sensor, reed switch, power supply, servo drive, LEDs are connected to the box via 3-pin JST connectors - each element can be disconnected from the overall system.
As a power source, I used a switching 12 V 2A power supply plugged into an outlet in the kitchen - a voltage of 12 volts is transmitted to the toilet via a three-meter wire. 12 volts, right inside the box, are converted by the KREN5 stabilizer to 5 volts. This voltage powers the Arduino, the infrared sensor and the servo. This decision is not accidental; the power wire has a relatively high resistance and, if measures are not taken, interference from a powerful servo drive will interfere with the operation of the controller. In addition, KREN5 heats the box and, thereby, fights the humidity inside it.
Electrical diagram of the device
Programming
The Arduino sketch can be downloaded here. The program implements the following state diagram:
State diagram
It should be noted that the system monitors both edges of the pulse from the infrared sensor. The leading edge transfers the system to some intermediate state (PREWAIT, PREDETECT), and the actual transition to the state (WAIT, DETECT) occurs at the moment of the falling edge of the pulse.
The FLUSH_GERCON state is added because raising the valve by the servo causes the reed switch to operate. The magnet that triggers the reed switch is not attached to the drain handle, but directly to the platform located on the valve. This solution adds feedback to the system - using a reed switch, the system determines the position of the valve - if for some reason the servo drive is in the wrong position and the valve is open, the reed switch will work, the servo drive will lower its arm, and the valve will move to the closed position.
After lifting the valve with the handle, the system enters the IDLE state and, within 30 seconds, ceases to sense signals from the infrared sensor. This gives the person the opportunity to leave the toilet without triggering the system again.
The servo drive is controlled by applying a PWM pulse to it with a duration of 0.9 - 2.0 milliseconds and a frequency of 50 Hz. The control signal, in addition to the ON (pulse duration 1250 μs) and OFF (pulse duration 1850 μs) states, has another “neutral” state when there is no control pulse. In this state, the servo simply maintains the position of the hand. The servo drive is in a “neutral” state almost all the time, this avoids wear and tear from small vibrations that can occur when a control pulse is applied to it.
Mechanics setup
Mechanical setup of the system is quite simple - you need to perform the following steps:
- Properly secure the “arm” of the servo drive and test that its movement is enough to open and close the toilet valve. (A “servo drive tester” is very suitable for this)
- Correctly select the length of the rod connecting the valve platform and the servo drive.
- Find the correct relative position of the magnet and reed switch.
System state table
LEDs
To control the operation of the program, I added 2 LEDs to the electrical circuit - red and green. To avoid drawing too much attention to them, I placed them on the side of the cistern, but they tell me information about the current state of the system.
| Phase | Time | Red LED | Green LED |
| INIT | 2 sec | Included | |
| READY | — | ||
| PREWAIT | ~ 3 sec | ||
| WAIT | 30 sec | Flashing | |
| DETECT | 120 sec | Included | |
| PREARMED | ~ 3 sec | Included | Included |
| ARMED | 180 sec | Included | |
| FLUSH | < 1 sec | ||
| FLUSH_GERCON | 5 sec | Included | Included |
| AFTERFLUSH | 2 sec | ||
| GERCON | — | Flashing | Flashing |
| IDLE | 15 sec | Flashing |
Result
What conclusions can be drawn? The device has been working for more than 4 months. There was only one mechanical failure - the valve rod, bent from a paper clip, straightened out after 2 months. I simply replaced it with one made from a larger paper clip. Electronics and software practically did not give a single failure. The cat also really liked the system, and now he uses the toilet himself at any time of the day, without requiring my attention. In general, I recommend it for production.
What to consider when choosing
Making a toilet for a cat with your own hands or buying one is the first thing owners of four-legged creatures think about. You need to give preference to a specimen that your pet will like and that you find convenient in terms of cleaning (do not forget that you will have to clean the tray quite often). To ensure that you are satisfied with your purchase, consider the following recommendations:
- buy the tray at an average price. A copy that is too cheap may not last a couple of years for your pet, but an overly expensive one is already an unnecessary luxury. Take into account the fact that the toilet must be used by the cat throughout its entire life - in adulthood, it is even more difficult to accustom a four-legged pet to changing the tray than a kitten;
- availability of space. Choose a litter box for your cat that is large enough for him to fit in completely. Some cat owners prefer to buy a mini-house for their tailed baby, but then it turns out that he grew up too quickly, and the money, in fact, was wasted. That is why, when deciding on the size of the tray, choose according to this principle so that an adult cat fits there;
- durable but fairly lightweight material. It is best to give preference to plastic;
- The surface of the tray should be smooth. If there are any decorations or roughness or defects on it, your four-legged pet may one day be seriously injured;
- An indoor dry toilet is not always suitable for cats. Pay attention to your pet's habits. If he doesn't like being left alone for long periods of time, he might not be too impressed with a toilet with a roof;
- easy to clean. It is very important that you can clean the cat litter without unnecessary complications;
- not too bright color and no strong smell. If the shade of the material is not flashy, and the tray does not give off the characteristic aroma of paint and other nonsense, you can safely buy such a litter box for your cat.
You need to be careful when choosing a toilet for your kitten. Stick to the basics and buy one that your four-legged friend will get used to quickly.
Types of cat litter
There are not many types of cat litter on the market, but each of them is aimed at certain buyers.
Tray with low sides
The classic type of cat litter is presented in the form of a trough with small sides on which a mesh is attached. Through the holes, urine flows into the filler, and feces remain directly on the “obstacle”.
Low-sided trays have gained popularity due to their versatility
- small size;
- possibility of placement in the toilet;
- high hygiene;
- efficiency;
- easy cleaning;
- suitable for kittens.
- presence of odor;
- filler cannot be used;
- prompt cleaning is required;
- not suitable for heavy cats.
Tray with high sides
This product requires the use of filler. The sides prevent it from scattering around the room when the pet scoops up waste products with its paws. Such models are equipped with a special film. It is attached to the sides. As soon as there is a need to change the filler, just carefully remove the film and throw it in the trash, and install a new consumable in its place. At the same time, the product itself remains completely clean.
A tray with high sides requires the use of filler
- possibility of using filler;
- cleanliness (the filler is not scattered throughout the room);
- additional tools can be built into the board;
- no smell.
- high cost;
- quite large size (not suitable for installation in cramped bathrooms);
- not suitable for training kittens due to the high altitude.
Closed toilet (dry toilet)
A closed toilet allows the kitten to feel protected. The owners are pleased with the aesthetics of the design. As a rule, the manufacturer equips the model with a special door through which the pet gets inside, but some owners remove it. They believe that this will be better for the animal. Having chosen such a model, the owner wonders how much this miracle costs. And having learned the price, he thinks about whether such a design is really necessary.
An enclosed toilet is important for shy cats
- no odor;
- will look neat anywhere in the house;
- possibility of using filler.
- high cost;
- difficult cleaning;
- not suitable for kittens and large breeds of cats;
- the presence of a door scares animals;
- some four-legged friends use this model not for going to the toilet, but for living;
- You need to put in extra effort to train it.
To increase hygiene, this type of tray can be equipped with a carbon filter. For example, in models from the manufacturer Ferplast. The operating principle is as follows: polluted air rises to the tray lid, into which a special filter is mounted, where it is cleaned of unpleasant odors and organic particles.
A toilet option can also be presented where the bottom of the structure has a grate and an antibacterial mat. Such know-how works correctly only with a special filler, which allows moisture to pass down and thereby starts the disinfection process.
What to look for when choosing a tray
When choosing a cat litter box, you need to think through all the details . After all, having accustomed a kitten to a litter box, it will be much more difficult to retrain an adult pet to another. There are points that you definitely need to pay attention to :
- Price. The price range for trays varies. There is no point in buying a very expensive toilet, just as there is no point in buying a very cheap one. It is better to choose a medium-priced product that can last a long time.
- Material . The material should be light but durable. Most often, plastic is used to make cat litter boxes.
- Size. When choosing a size, it is better to focus on the dimensions of an adult animal, not a kitten. The cat needs to fit entirely into the toilet, which means the dimensions must be appropriate. This aspect of choosing a litter box especially applies to closed litter boxes for cats (for example, a house), since in adult life the roof of such a house may turn out to be too low for a pet.
- Weight. The litter box for cats should not be too light, otherwise during raking it will turn over along with the contents of the litter box.
- Presence of defects . Before purchasing, you need to check the product for any defects, for example, roughness that could injure your pet.
- Cleaning the toilet. An important selection criterion will be how easy the toilet is to clean. Will it be easy to clean all the corners or will it take some effort? There are special types of trays on which disposable bags are placed before filling. Practical enough.
- Construction type. Depending on the character of the cat, you can choose a toilet with or without a roof. In such a house the pet will feel safe. Often such houses are convenient, since nothing spills out when raking.
- External characteristics . During the initial inspection, you need to exclude from the selection trays that have a strong plastic smell or bright colors. These products are likely made from cheap plastic, which means their service life will be short.
How to accustom your pet to “conveniences”?
Adults have difficulty changing habits. Therefore, training and accustoming to a house toilet should begin from an early age.
Training a puppy
From the first days of being at home, you should monitor the puppy to understand when he wants to relieve himself. This usually happens after eating, active games, sleep and manifests itself in restless behavior.
If the baby himself has chosen a place for the toilet that suits the owner, a tray should be placed in this corner. The pet sits on it when there is an urge to defecate, praises it and rewards it with a treat when the dog potty has been used for its intended purpose. You can’t scold or poke your puppy’s nose - he may perceive the litter box as a place of punishment and start walking to another corner.
You can place a small piece of paper or fabric soaked in puppy urine in the toilet. Dog breeders recommend making a path of several absorbent diapers, laid to the tray. At first, the baby will relieve himself on a soft surface. The farthest wet diapers are gradually removed, eventually the dog ends up near the tray. There will only be one left, placed in the tray. This will help your dog understand what the litter box is for.
From diapers, you can move on to the filler when the pet has a good understanding of where the tray is located and what it is intended for.
Attention! House toilet training a dog can take several months. You need to be patient, not deviate from the intended goal, try different options, for example, an enclosure or other restriction of movement.
You can use products that lure or repel your dog during potty training. It is also recommended to place a bowl of food in inappropriate places chosen by the puppy for the toilet - he will not defecate where he eats.
If your pet does not want to go to the tray, you should correct possible mistakes in choosing a place, container, or filler. And when a toilet-trained dog suddenly begins to defecate in inappropriate places, it is recommended to check the state of its health.
How to make a toilet for a cat with your own hands: plastic design
Making a plastic “toilet” for a cat is not at all difficult and does not take long. Some complicated tools won't be useful either. So, to make a “latrine” for a catfish, you will need:
- Plastic container (bath, construction basin).
- Marker, masking tape.
- Hacksaw. It can be replaced with a jigsaw or grinder.
- Coarse sandpaper or file.
- Acrylic paint.
The algorithm is as follows:
- Take a suitable plastic container.
- Mark the cut location with a marker or tape. You choose the height of the sides yourself, depending on the age, size and individual characteristics of your pet predator.
- Cut off all excess using a jigsaw, hacksaw or grinder. It is not advisable to use scissors for this purpose, as the material may crack.
- Clean the cut areas with sandpaper or a file.
- If desired, paint the container with acrylic paint (preferably from a spray can).
Important! If you take a closed plastic container and cut an entrance into it, you will get a cozy “toilet-house” for a shy pet.
Nuances of toilet problems
The owner must ensure the cleanliness of the tray: wash it regularly, remove soiled diapers (wash if they are reusable), throw away used lumps of filler. The dog will refuse to relieve itself in a dirty container and will choose another, undesirable place to do so.
Attention! You should not wash your dog's litter box with bleach in hopes of removing the unpleasant odor. The pet's delicate sense of smell is receptive to even a small amount of this substance, and the dog will stop going to the treated tray. In addition, chlorine is harmful to the respiratory tract.
Other chemical detergents should also not be used. The smell of urine can be eliminated with hydrogen peroxide poured into the bottom of the container.
If your pet is used to relieving itself on the lawn, you can offer him a dog toilet with grass. Probably a familiar surface promotes habituation, and a piece of lawn will be enough.
Carpeting should be removed from the floors until the dog gets used to the litter box. It is much more comfortable to defecate on soft surfaces, so there is no need to provoke.
Toilets for small breed dogs need to be of the appropriate size. In a container that is too spacious, the pet will be uncomfortable, and he will not go to the tray.
The choice of location for the home toilet is of great importance. It should be installed in a corner where the dog will not be disturbed. Most often, owners place the tray in the bathroom or near the front door. The toilet should always be accessible to the pet; it is not advisable to move it.
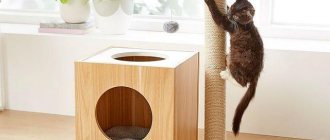
DIY wooden cat tray
As already mentioned, this is a temporary option. You can use a box made of plywood or boards as a “bathroom” for the mustachioed tabby.
So, you will need:
- Boards or plywood sheets.
- File, jigsaw.
- Screwdriver.
- Screws or self-tapping screws.
- Metal corners.
- Thick waterproof film.
The procedure is as follows:
- Make a sketch or drawing of the future product, taking into account the dimensions and configuration. It can be a rectangle or a triangular structure (for placement in a corner).
- Cut out 3 or 4 (depending on the configuration) sides for the future tray. Fasten them together using screws or self-tapping screws.
- Cut out the bottom and attach it to the frame using corners.
- Cover the bottom of the product with film and fill it with filler.
The toilet is ready!
Five mistakes when arranging a cat litter box
When a kitten is brought into the house, the issue of hygiene becomes acute. Cats are capricious creatures, they have their own minds; they ignore a tray they don’t like for secret reasons. Pets are irritated by the smell and litter scattered around. How to find a compromise and avoid mistakes that happen when arranging a cat litter box - let's figure it out.
1. Inconvenient tray design
Manufacturers offer trays of different sizes, rectangular, corner. In most cases, this is an open plastic container above or below. Some individuals prefer high sides in order to dig deep into the filler. Trays are produced with a plastic mesh - but your pet may not like it.
Others willingly use closed models - they give a feeling of security. A closed toilet has disadvantages - a door that needs to be opened; limited internal space. Therefore, you should not be surprised if the cat refuses this model. By the way, the door can be removed.
2. Dirty toilet
Cats are partial to smells, but are often loyal when the owner does not clean for a long time. There is a limit to everything - if your pet makes a puddle nearby, then perhaps you should change the filler and wash the tray. Sanitation rules recommend completely removing the contents once every five days and removing lumps of clay or wet sawdust daily. Do not use liquids containing chlorine or strong-smelling disinfectant solutions to wash the container. They will scare a sensitive pet away from the toilet.