Postoperative care is the most important aspect of sterilization of cats, since after the operation all care for the animal rests with the owners. The most pressing question for many remains how long to wear a blanket after sterilizing a cat. The main problem is that animals refuse to wear a protective bandage and try with all their might to free themselves from it. Looking at the suffering of their pets, the owners try to remove the bandage early, without even realizing that such a decision is not always the right one.
How to care for the suture after surgery?
Once the edges of the incision tighten, there will be no need for additional support. Removal of sutures in the head, face and neck area occurs already on the 5th day after the operation. If they were applied in the area of the torso or limbs, then it will take at least 10 days for the wound to heal. Daily dressings are necessary for the first few days. The patient usually spends this time in the hospital. After discharge, tight bandages are usually no longer needed. But if necessary, you can always change the dressing at the nearest hospital or medical center.
Caring for the suture after surgery consists of daily treating the incision area with an antiseptic and taking medications that accelerate tissue regeneration. All medications for home therapy are used strictly according to the doctor’s recommendation!
Treatment of sutures is usually carried out with ready-made pharmaceutical preparations or homemade antiseptics, such as solutions of iodine, potassium permanganate, brilliant green or hydrogen peroxide. To avoid getting a chemical burn when performing such procedures, the liquid for disinfection should be prepared only according to a prescription issued by a doctor.
To speed up regeneration processes, external agents with wound healing and antibacterial effects are used. These include balsamic liniment (better known as Vishnevsky ointment), levomekol, ichthyol ointment and many others.
Skin suture from the general surgeon's point of view
It's no secret that quite often our patients evaluate the quality of the surgeon's work, even after the most complex abdominal interventions, by the appearance of the skin scar. Yes, we do not engage in aesthetic surgery – “surgery of pleasure”; we restore people’s health and, often, life. However, the common phrase that “when you lose your head you don’t cry for hair” is often not enough for today’s overly demanding patients to explain the appearance of a rough, deformed scar on the abdominal wall. And such cases, as we know, are not uncommon. Of course, some wounds heal by secondary intention. But this accounts for no more than 10% of all laparotomies. What's the matter? It may be that we pay significantly less attention to the skin suture at the end of the operation than it deserves. Or we generally entrust its application to novice surgeons: where else can they learn to work with tissue and a needle. The most interesting thing is that, according to fellow plastic surgeons, the skin is a very “grateful” tissue, whose healing is disrupted only by very serious errors in surgical technique. The violation of reparative processes in the skin is understood not so much as its divergence after the removal of sutures (this is an easily removable problem), but rather the occurrence of hypertrophic scars. Hypertrophic scars consist of dense fibrous tissue in the area of damaged skin. They are formed due to excess collagen synthesis. Scars are usually rough, tight, raised above the surface of the skin, have a reddish tint, are hypersensitive and painful, and often cause itching. Hypertrophic scars are divided into two main categories. 1. A normal hypertrophic scar corresponds to the boundaries of the previous wound and never extends beyond the damaged area. The leading role in the development of hypertrophic scars is played by the following factors: large size of the healing wound defect, ischemia of the skin in the suture area, prolonged healing and constant trauma to the scar. After 6–12 months, the scar usually stabilizes, acquires a clear outline, demarcated from the atrophic part of the scar and intact skin, and somewhat decreases and softens. 2. Keloid is a scar that penetrates into the surrounding normal tissues that were not previously involved in the wound process. Unlike hypertrophic scars, keloids often form in functionally inactive areas. Its growth usually begins 1–3 months after epithelization of the wound. The scar continues to enlarge even after 6 months and usually does not shrink or soften. There is typically no parallelism between the severity of the injury and the severity of keloid scars; they can occur even after minor injuries (puncture, insect bite) and often after a IIIA degree burn. Stabilization of the keloid scar usually occurs 2 years after its appearance. It is characteristic that keloid scars almost never ulcerate. The pathogenesis of keloids is unknown. Some authors regard them as benign tumors. Apparently, the most correct idea is that the formation of keloids is caused by a violation of the development of connective tissue. Auto-aggression is possible due to excess content of biologically active substances in tissues. The role of endocrine disorders, individual predisposition to the development of keloids, and the predominance of young and middle-aged patients with such scars cannot be excluded. Hypertrophic scars are difficult to treat. Excision of the scar can lead to its re-development. Injections of steroids into the scar area (and/or injections following excision), as well as close-focus radiation therapy, can prevent scar recurrence.
We in no way call for giving excessive importance to the aesthetic aspects of the skin suture on a laparotomy wound - the main field of activity and manifestation of the skill of abdominal surgeons is hidden from prying eyes. However, in addition to the “substrate for cosmetic effect,” the skin is also part of the surgical wound of the anterior abdominal wall, which requires no less care in forming skin sutures than when suturing the aponeurosis. Moreover, the skin suture does not require some incredibly complex technical and time costs (as they talk about this too often in specialized institutions...).
When forming a skin suture, you should:
- adhere to precision technology with precise comparison of the epidermal and dermal layers;
- strive to evert the edges of the skin; inversion (screwing the edges of the skin into the wound) is unacceptable;
- use minimally traumatic suture material (monofilament or complex threads of size 3/0-0 on an atraumatic cutting or reverse-cutting needle in ½ circle);
- use atraumatic tweezers or single-pronged hooks for skin traction;
— avoid tension of the skin with thread (only apposition and immobilization);
— eliminate cavities and pockets in the subcutaneous fat layer;
- form the suture in such a way that each thread passes through the skin only once, minimizing cross-infection along the entire suture line;
- use removable or absorbable threads;
- do not interfere with the natural drainage of the wound in the first two to three days of the postoperative period;
- leave the minimum possible amount of suture material in the wound.
It should be noted that the presence of some special “cosmetic seam” is just a common misconception. Any skin suture that meets the above requirements can be fully considered cosmetic. Currently, several types of sutures are most common for suturing skin wounds.
A simple interrupted suture is a single suture applied in a vertical plane, most common for apposition and immobilization of the edges of a skin wound, due to the ease of application, hemostatic effect, and the possibility of good adaptation of the wound edges.
The nuances of forming a simple interrupted skin suture include the following mandatory technical points:
— injection and puncture are made strictly perpendicular to the surface of the skin;
- the injection and puncture must be strictly on the same line, perpendicular to the length of the wound;
— the distance from the edge of the wound to the injection site should be 0.5-1 cm, which depends on the depth of the wound and the severity of the tissue layer;
— the thread is carried out to capture the edges, walls and, of course, the bottom of the wound to prevent the formation of cavities in the wound;
- if the depth of the wound is significant and it is impossible to apply a separate suture to the subcutaneous tissue, multi-stitch sutures should be used (for example, Struchkov’s suture);
- the distance between the seams on the skin of the anterior abdominal wall should be 1-1.5 cm; more frequent stitches lead to impaired microcirculation, more rare stitches lead to the appearance of diastasis of the wound edges;
- in order to avoid microcirculatory disorders and unsatisfactory cosmetic effect (transverse lines on the scar), the tightening of the seam should not be excessive, with the formation of a pronounced “roller” over the skin, the thread should only ensure a tight juxtaposition of the skin layers;
— the formed knot should be located on the side of the line of the sutured wound, but not on it.
The McMillen-Donati suture is a single vertical U-shaped interrupted suture with massive capture of the underlying tissue and targeted adaptation of the wound edges. Effectively used for suturing deep wounds with large diastasis of the edges. Apply using a large cutting needle. The injection is made at a distance of 2 cm or more from the edge of the wound, then it is injected so as to capture as much as possible and carried out to the bottom of the wound, where the needle is turned towards the midline of the wound and punctured at its deepest point. Then, on the side of the puncture, along the screed, a few mm from the edge of the wound, the needle is again injected and withdrawn into the thickness of the dermis on the opposite side, the needle is passed in the same way in the opposite direction. When the knot is tightened, homogeneous tissues are juxtaposed. The disadvantages of the seam include an unsatisfactory cosmetic result due to the formation of rough transverse stripes.
A slightly modified version of the McMillen-Donati suture is the Allgower suture, characterized in that the thread is not passed through the surface of the skin on the contralateral side. Single interrupted skin sutures have both advantages and disadvantages. The advantages of single interrupted sutures include their relative simplicity and low time costs for their application, the presence of natural drainage of the cavity of the sutured wound in the first days of the postoperative period through the spaces between the sutures, the possibility of limited opening of the wound when removing one or more sutures. The disadvantages of single sutures include the insufficient cosmetic effect when using them, even if they are formed technically correctly. The fact is that single sutures are removable, and for proper scar formation it is necessary to immobilize the edges of the skin wound for as long as possible. In addition, when forming individual seams, the appearance of transverse stripes or scars at the points of needle insertion is inevitable. Based on the requirements for a cosmetic effect, J. Chassaignac and W. Halstedt proposed the formation of a continuous intradermal suture along the entire length of the wound.
The Chassaignac-Halsted suture is a continuous internal adapting suture. The suture thread passes through the dermis, in a plane parallel to the surface of the skin. The needle is inserted on one side of the incision, passing it only intradermally. After this, they move to the other side of the incision. On both sides, the same amount of dermis is captured into the seam (0.5 - 1 cm). In essence, this seam is a continuous horizontal U-shaped one. At the end of the suture, the needle is poked into the skin, 1 cm away from the corner of the wound. The thread is fixed either with knots directly above the wound, or with special anchor devices.
The formation of the Halstead suture ensures complete adaptation of the epidermal and dermal layers of the skin and, accordingly, the best cosmetic effect. When forming this suture, particularly careful hemostasis is required, preliminary elimination of the residual cavity by suturing the subcutaneous tissue and the absence of skin tension. In the case of a large wound (over 8 cm), theoretically, difficulties may arise when removing a long non-absorbable thread, therefore, when applying such a suture, it is recommended to puncture the surface of the skin every 8 cm in order to be able to subsequently remove the threads in parts.
As already noted, a prerequisite for the use of a continuous intradermal suture is careful comparison of the subcutaneous fat tissue. In addition to the hemostatic effect and prevention of residual cavities, suturing the tissue helps to bring the edges of the skin wound together and makes it possible to apply a skin suture without tension. In this regard, J. Zoltan proposed an improved version of the intradermal suture.
The Halsted-Zoltan suture is a continuous two-row stitch. The first row is applied approximately in the middle of the subcutaneous base, the second - intradermally. The first needle injection is made near the end of the wound, at a distance of 2 cm from one of the edges. Then the needle is injected and punctured alternately in one and the other wall of the wound, passing it only along the middle of the thickness of the subcutaneous tissue in the horizontal plane (continuous U-shaped suture). Having completed the formation of a deep row of seams, the thread is brought to the surface of the skin. Both ends of the thread are pulled, thus bringing the edges of the wound closer together. To form the second row, the tip of the needle is brought into the dermis. Continue to sew in such a way that the puncture and puncture points are located symmetrically relative to the cut line, as with a regular Halsted seam. Until the surface suture is completed, the threads are kept taut, then a knot is formed by tying the ends of the threads to the skin.
An indispensable condition for the formation of a continuous intradermal suture is the use of only a monofilament thread of size 3/0 - 2/0 on a cutting or, better, reverse-cutting needle. The question of the preference for using absorbable (non-removable) or non-absorbable (removable) monofilament thread for a continuous intradermal suture remains open today: some surgeons remain staunch supporters of Prolene, while others invariably use Monocryl.
To achieve the best cosmetic effect, which is largely associated with trauma to the skin when threading, combined methods of closing the skin wound are used. Recently, a method that includes, as one of the components, the use of an adhesive application to immobilize the skin after reduction and protect the wound from exposure to the external environment, has become increasingly popular. In this case, Dermabond is used as a means of immobilization and protection - a medical glue based on 2-ocycyanoacrylate and a violet dye for contrasting with the skin. After application to the skin, Dermabond, due to contact with air, passes from the liquid phase into the elastic-elastic gel phase with exceptionally strong adhesion to the skin within 30-60 seconds. At the same time, a durable film is formed on the skin, preventing diastasis of the wound edges and protecting the edges and walls of the wound from contamination by microorganisms (the use of glue eliminates the need to use aseptic dressings on the postoperative wound). Dermabond provides immobilization of the edges of the skin wound for up to 7-8 days and after this time it independently fragments and is removed from the skin. Mandatory conditions for the use of Dermabond glue are thorough hemostasis and tight closure of the wound edges with a suture of subcutaneous tissue: it is possible to use a continuous suture or separate sutures with absorbable material. That is why this method of closing a skin wound is combined - suture and glue. It can be assumed that the introduction into clinical practice of connecting the edges of a skin wound using an adhesive application in itself indicates the direction of evolution of methods for connecting tissues in surgery: from threads to polymer adhesive materials.
Some tips for caring for your cat after surgery
If the animal refuses to let its owner near, fights and breaks out, then you should:
- give the animal sedatives during the recovery period;
- do not show aggression or dissatisfaction with the behavior of the animal, talking affectionately and stroking it;
- carry out the treatment after swaddling the pet with a soft towel.
It is forbidden:
- use alcohol tinctures for processing;
- rub the surgical site;
- Thickly lubricate the seams with a healing agent;
- apply a tight bandage.
Proper care and the presence of blankets are the key to a speedy recovery.
Processing and removal of seams
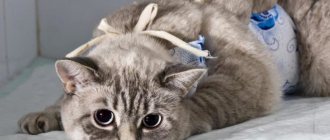
The sterilization operation is carried out under anesthesia; the owner needs not only to properly remove the animal from this state (properly contain, feed, give water), but also take care of the cleanliness of the wound.
The procedure for treating sutures begins on the third day after sterilization
The procedure for treating sutures begins on the third day after sterilization, at intervals of 2 times a day.
Algorithm of actions:
- Calm the beast, remove the bandage.
- Use a cotton swab soaked in an antiseptic (without alcohol) to generously moisten the wound surface with gentle movements.
- Remove hairs and dried blood.
- Inspect for inflammatory processes.
- Put on a bandage.
Attention! In some cases, to speed up healing, cat owners apply iodine or brilliant green to the stitches. It is strictly not recommended to do this: the drugs dry out the edges of the wound, inhibit recovery processes, and can lead to chemical burns of the skin.
What to do if the cat takes off the blanket on its own
The animal will not be able to remove the bandage that is properly secured. A cat that has been castrated along the linea alba should be in a blanket until the postoperative wound heals.
If your cat removes the bandage, you must carefully read the instructions to secure it correctly and prevent it from being removed in the future.
When treating a seam using a special spray, you do not need to use a blanket (in this case, the wound is reliably protected from contamination and infection).
What affects the duration of wearing a blanket?
The number of days directly depends on the method in which the postoperative sutures were processed.
Types of processing:
- Using a protective spray. This method of treating a postoperative suture protects the wound from the development of inflammatory processes, accelerates the healing process, has a beneficial effect on overall well-being, and reduces the period of wearing protection to 7 days.
- Without using protective spray. In this case, we are talking about a time interval from a week to 10 days, it all depends on the condition of the animal and the speed of healing of the skin.
Be sure to read:
How to care for a cat after sterilization: blanket, diet, treatment and removal of sutures
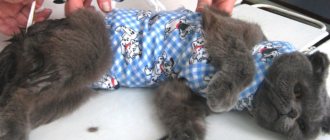
The protective bandage is made from natural fabrics (cotton), does not irritate the animal’s skin, does not allow the cat to lick the wound, protects against inflammation of the seam, but causes some discomfort to the pet.
Your furry pet may notice changes in behavior or gait, but as soon as the protection is removed, everything will be restored.
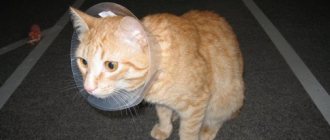
Important! Many owners independently decide when to remove the blanket after surgery, based on the fact that the cat is hampered by the protective bandage. If the bandage is removed without the advice of a veterinarian, it is necessary to constantly monitor the pet. You can use a special collar that will prevent the animal from licking the seam.
When is it possible to remove the protective device early?
The protective bandage is made from natural fabrics (cotton) and does not irritate the animal’s skin . Early removal is possible if:
- the surgical intervention was carried out using laparoscopy: in this case, the wound is so small that protection is not required;
- when performing sterilization, the surgeon used absorbable suture material and protective sprays to treat the wound;
- Four days after the operation, the cat has a normal body temperature, there is no bleeding, redness of the suture, or suppuration.
Important! When using suture material that requires further removal, you should not remove the bandage ahead of time, even if it causes discomfort to the animal.
After examining your pet, the doctor may recommend getting rid of the protective accessory ahead of schedule if:
- aggression is clearly expressed, the animal continuously tears off and gnaws the blanket;
- the animal is afraid to walk in a bandage;
- ulcerations appeared under the places where the tissue puts maximum pressure on the body;
- the bandage became very dirty due to eating and visiting the toilet.
Why is it needed?
A blanket is required for an animal undergoing abdominal surgery. It performs several functions:
- covers the postoperative suture;
- prevents contamination and infection;
- protects against scratching and licking of the wound surface.
When the stitches are treated, the dressing or bandages are changed, it is not always necessary to remove the bandage. If the postoperative suture is located at the bottom, it is enough to untie several ties and bend the edges to gain access to the desired area.
If the bandage becomes contaminated with discharge from the wound, it will have to be replaced to prevent infection from entering the seam and the development of inflammation.
Often, immediately after surgery, a blanket is placed on the cat. However, with intradermal sutures there is no need to protect the surgical field. But such sutures are rarely used during sterilization.
Cat's diet after sterilization
After sterilizing a cat, special attention should be paid to its diet and significant adjustments should be made to the daily menu. Since after this procedure the metabolic process in the animal’s body slows down and other important changes occur in the functioning of internal organs, proper nutrition will become an integral part of proper care for your pet.
Rules for feeding a cat after sterilization:
1. In the first days after surgery, the cat should not be given solid food. The stool must be liquid so that the postoperative sutures do not come apart during a visit to the toilet.
2. For the first 2-4 days, the pet’s diet is reduced and is only a third of the usual dose.
3. On days 4-5 after surgery, you can gradually increase the portions by 100-150 g per day.
4. Since cats are prone to obesity after sterilization, the usual daily food intake should be reduced by 120-130 g.
What and when to feed
On the first day after sterilization, the cat should not be fed until it recovers from anesthesia. If by the evening of the first day after waking up the animal demonstrates severe hunger, you can give it a little low-fat broth from a syringe.
Food for a cat after sterilization should be easily digestible and of high quality. Fatty meats, raw and river fish, fatty dairy products, smoked meats, pickles, legumes, raw eggs, as well as pearl barley, oatmeal and semolina are excluded from the diet.
To prevent urolithiasis and obesity, experts recommend feeding your cat 2-3 times a day in small portions.
Daily diet for an adult cat:
If symptoms of obesity appear after sterilization, the cat is transferred to fractional meals.
If the owner feeds a domestic cat with special food, it is recommended to choose high-quality premium or super-premium formulations. Cheap food contains a lot of salts and heavy minerals that contribute to the development of liver and kidney diseases. The range of industrial foods includes special formulations for sterilized cats. They can be used for everyday feeding of your pet, but you should not give such food to your cat in the first days after sterilization.
When can you give water?
You cannot feed and water the animal immediately after surgery. You need to wait until the cat recovers from anesthesia. Water can be given in small quantities, soldered through a syringe without a needle.
Coming out of anesthesia
The pet will spend most of the first day sleeping. During this time, she cannot regulate her body temperature, so when transporting her home, care should be taken to keep the dog warm, but not overheated. The same rules will apply at home. There should be no drafts, the animal should lie on a flat surface, a mattress or sofa will do, but this option is only suitable when the dog is closely monitored during this period. Otherwise, in a semi-conscious state, the dog may try to get up and fall to the floor. Despite the necessary warmth, you should not place your dog near heaters or radiators, as this may cause internal bleeding. The ideal option would be a mattress on the floor in a draft-free room, and the dog should also be covered with a blanket or light blanket. It is necessary to put diapers under the pet; involuntary urination is a normal reaction for this period.
Literature
- Belyaev A.N., Kozlov S.A., Taratykov I.B., Novikov E.I. Patient care in a surgical clinic: textbook. allowance. – Saransk: Mordovian University Publishing House, 2003. – 136 p.
- Buyanov V. M. Egiev V. N. Udotov O. A. Surgical suture. – M.: Antis, 2000. – 92 p.
- Zoltan J. Operating technique and conditions for optimal wound healing. – Budapest: Publishing House of the Academy of Sciences of Hungary, 1983. – 175 p.
- Mironova E. N. Fundamentals of physical rehabilitation. – M.: MOO “Academy of Safety and Survival”, 2021 – 310 p.
- Semenov G.M., Petrishin V.L., Kovshova M.V. Surgical suture - St. Petersburg: Peter, 2001. - 256 p.