Cats' saliva has unique disinfecting and healing properties, which is why they instinctively lick wounds and scratches. And if for stray animals this is the only opportunity to treat damage, then for pets there are many other ways. And to prevent cats from biting wounds and licking medications, their actions must be limited.
Let's find out what a veterinary collar is and how to make it at home.
What should an Elizabethan collar look like?
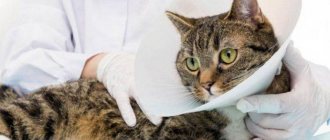
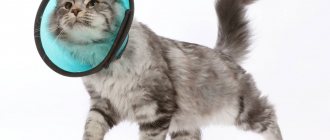
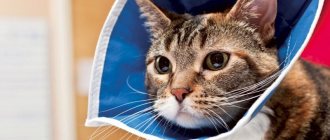
The Elizabethan collar is a cone-shaped design whose brim forms a barrier around the head.
It is very helpful in the postoperative period, when it is necessary to protect the animal’s wounds from scratching, gnawing and licking. Some owners also use it if it is necessary to treat their pet’s fur with parasite preparations that contain toxic components, and with hormonal agents.
A protective collar for cats can be purchased at a veterinary clinic or made by yourself. Regardless of the design option, the main requirement for the product is that it should be as comfortable as possible for the animal. The headband wrapped around the head should not rub the neck or make breathing difficult.
Table: advantages and disadvantages of protective devices
| pros | Minuses |
| Reliably limits the cat's access to the sore spot | May cause fear and dissatisfaction in the animal |
| Will not allow the cat to hide in a hard-to-reach place | Able to cling to objects |
| Can be purchased by choosing an inexpensive option | The cat is uncomfortable eating |
| You can make the collar yourself | |
| Lightweight and durable | |
| Can be used to trim fur and nails |
Made from thick fabric
A soft protective collar for cats after surgery is a product of increased comfort. It is ideal for gentle cats who are not ready to tolerate any restrictions. The collar is light and cozy. It's comfortable to sleep in.
To sew such a collar for a cat after sterilization, it is not at all necessary to have mastery skills. The product consists of only 2 identical parts made of natural fabrics. The layer between which is a denser fabric or a multi-layer lining, reinforced with diamond-shaped stitching. To give the collar the desired shape, the opposite edges of the product are supplemented with strips of adhesive tape.
The pattern of the product is shaped like the letter “C”. The length and width are selected depending on the size of the cat.
To correctly create a pattern, take 2 measurements:
- neck girth - it will correspond to the length of the inner semicircle;
- the length of the neck from the landing point of the product to the tip of the nose is the width of the future collar
Apply a semicircle that corresponds to the inside of the product on paper or directly on the canvas. Then retreat the specified width and duplicate the line, making an outer semicircle. Cut out the workpieces, not forgetting to provide indentations for the seams. Place the pieces right side out, placing a thick layer between them. Sew up the details. To increase the rigidity of the product, stitch a edging made of dense material along the outer edge.
Despite the simplicity of execution, this option is convenient in the sense that it has an aesthetic appearance and at the same time copes well with the task assigned to it.
But it is not suitable for active pets, since with regular protests and attempts to tear it off the body, the collar will become deformed and will not provide full protection. There is only one way out - to observe the behavior of the pet and, if necessary, replace the soft product with a more rigid structure.
DIY sewing
Although blankets can be quickly made from scrap materials, sometimes problems arise. They are difficult to fix on the cat and it is almost impossible to choose products of the appropriate size. The quality of materials also does not always meet expectations. If it is not possible to buy a suitable option, then it is better to sew the model yourself.
First you need to take all measurements to create a pattern:
- body length excluding tail;
- volume of the animal's chest;
- the distance between the hind and forelimbs.
The pattern resembles two connected rectangles with holes for the paws - a large one that will cover the body, and a small one that is attached at the base of the tail. Ribbons are sewn to all edges of the product; there should be at least 8 of them in total, but it is better to increase this number. When transferring the contour of the model from the pattern to the fabric, allowances of 1 cm wide are added on each side. If Velcro is used for fixation, then increase the figure to 5 cm.
After this, you need to choose the appropriate fabric. It should be soft and elastic, but not subject to strong stretching. Fraying textiles are not suitable as their fibers will get into open wounds. To check, a small piece of material is tied into a knot. A high-quality product will not tear, threads will not fly off. Dyed fabric is also not suitable as it will fade. A pattern is cut out of the material and the edges are hemmed. Then Velcro or ribbons are attached.
The version with Velcro is more convenient to use; with their help it is easy to remove and put on the blanket. The compactness of the fasteners allows the cat to move freely, they will not restrict her. The sticky sides of the fastener quickly become covered with dirt and wear out; they will have to be re-stitched periodically. Particularly active and inquisitive cats can learn to unfasten them.
It is easier to sew ribbons onto the blanket, and they are made from the same fabric as the bandage itself. If you tie them tightly, then even with the active behavior of the animal they will remain motionless. But bows and knots will cling to surrounding objects, and if the knot is tightened too much, you will have to cut the part and sew on a new one.
Made of plastic
If your cat is restless and persistent, then in the postoperative period it is better to use a more rigid structure. To make a hard cat collar with your own hands, it is advisable to use flexible plastic.
To simplify the task, use this pattern as a basis. It is better to first print it on a printer and then transfer it to plastic.
If you have a large bottle with smooth walls at your disposal, then it is quite possible that you can get the required piece from it. You just need to attach the printed pattern to the surface and trace along the contour.
The numbers in the photo indicate: 1 – straps for covering the collar, 2 and 4 – places of sharp edges of the product, 3 – clasp.
To assemble the structure, all that remains is to bend three radial strips in half. Then you need to pass a collar or harness through them. The longest strip is used to join the edges. It just needs to be launched through the slots.
Important point! The main condition when creating such a collar is to reduce the risk of injury. The edges should not be sharp, otherwise they will hurt or cause chafing on the cat's delicate skin. It is better to frame them with tape or a fabric strip.
Another interesting, but at the same time quite simple to implement, manufacturing option based on a stationery folder is described in detail in the video clip:
If you wish, you can limit yourself to the very option of making a collar for cats, which is not difficult to make with your own hands from a bottle.
The basis for production was a plastic bottle. The neck was cut off and the sharp edges were sealed with tape. Holes were made in four places at equidistant distances, into which ropes were inserted to secure them to the collar.
Note! To prevent chafing, there should be a finger-thick gap between the collar and your pet's neck. Too large a gap is also bad, because with its help the cat can easily remove the collar with its hind paws.
Even if your pet has a calm disposition, fixing the collar is mandatory. As an alternative to taping, the sharp edges can simply be melted off. A visual inspection will help determine the need for additional insulation of areas adjacent to the wool. Redness may begin to appear within 20-40 minutes from the moment of putting it on.
What to look for when choosing
The effectiveness of a protective collar depends primarily on the correctly selected model. To avoid mistakes, follow basic expert advice:
- The height of the cone should be such that the cat is both comfortable and safe. Don’t take one that’s too high, but a short one isn’t an option either. In the first case, the cat will not have lateral vision, in the second, it will easily reach painful areas.
- It's not worth saving. In the production of budget models, harmful materials with a specific odor are often used.
- The tapered part of the collar adjacent to the neck should not be extremely elastic. There must be free space between the bandage and the animal's neck so that the finger can easily pass through. Close contact with the skin is fraught with the occurrence of an allergic reaction and breathing problems, and weak contact can lead to quick removal of the cap.
- The prickly protrusions of the structure must be sealed with tape so that the animal does not get injured.
- It is not advisable to buy products that are too large and heavy, even if they are visually attractive. Such structures complicate movement and prevent free vision.
From cardboard
As a temporary option, you can use a cardboard cat collar, which is easy to make with your own hands.
For manufacturing, it is best to choose thick packaging cardboard. These could be old boxes and crates. Some people opt for corrugated cardboard, but it is not so convenient to work with or carry.
To create a pattern, draw a semicircle on cardboard. The main thing is to make all calculations based on previously taken measurements.
Roll the blank into the desired shape and try it on the cat. Frame all cut lines with edging. The fastening option can be any: a strap system or fixation with lacing.
Be prepared for the fact that, regardless of the design, the collar will not cause much delight in the animal. Therefore, be patient and try to make life as easy as possible for your pet while wearing a restrictive structure.
Caring for a cat in the first postoperative hours
After the operation, the cat will be very weak for the first three hours. He will experience dizziness, nausea, thirst, and muscle weakness. This is a normal condition that should not bother the owner, so the pet will recover from anesthesia.
The owner may be offered to leave the pet on the first day at the clinic, under the supervision of a doctor, but he will be there in a stressful state. Therefore, it is better to take him home so that the cat feels the care and participation of the owner.
During the postoperative period, the cat experiences:
- Dry eyes. During anesthesia, cats' eyes do not close, they remain open. During the operation, the veterinarian closes the animal's eyelids from time to time so that the conjunctiva is moistened with tears. If the cat has not yet recovered from anesthesia, then the owner will have to do this.
- In order to properly care for your pet's eyes, you need to buy tetracycline eye ointment or antiseptic drops. After the pet has recovered from anesthesia, there is no need to close his eyes; he will do this on his own. There are times when an animal lies for a long time with its eyes open, then it is necessary to drip saline solution into the eyes. This will save them from dryness.
- Low body temperature. The usual cat temperature is 37.5 – 39.0 degrees Celsius. In the postoperative period, the temperature can drop to 36.5 - 37.0 degrees. The cat should be placed on a warm bedding and covered with a warm blanket. In extreme cases, the cat can be warmed with a heating pad. To normalize blood circulation, he needs to rub his ears and paws.
- Unsteady gait. This is due to the relaxation of muscles during the application of anesthesia. Usually during this period the cat walks with a staggering gait. On the first day, you should better monitor your pet so that he does not climb to any height, otherwise he may not be able to hold on and fall.
- At first, the cat needs painkillers. If your pet is silent, this does not mean that he does not feel pain. Most animals silently endure pain. They completely refuse food and are in a motionless position. Their pupils, as a rule, are dilated and concentrated. The gaze is fixed on one point.
Blanket for a cat: detailed instructions on how to sew and wear
To an inexperienced owner, a post-operative blanket for cats may seem like a rather complicated “thing” - rags, strings, holes of some kind. And why bother the cat with all these ties? If you are less nervous, you will get better faster. If your veterinarian forgot to show you how to tie a blanket for your cat, do not rush to violate the doctor's instructions. The blanket protects the seam from dirt - bacteria, germs, fungi, microorganisms. Inflammation of the suture is one of the main postoperative complications, do not risk your pet’s health!
Before sewing a blanket for a cat or buying a finished product, check with your veterinarian whether your pet needs additional protection. There are many technologies for suturing and postoperative treatment: sometimes a blanket is not only unnecessary, but can also harm the pet. Be sure to ask your veterinarian if a blanket is required.
How to choose a bandage?
Before you put a blanket on your cat, make sure that you have a quality product in front of you. You will not be allowed to check the bandage before purchasing (and if they are allowed, refuse to purchase - it is unknown how many people and with what hands touched the material that will come into contact with the seam). At the purchase stage, you can only choose the size - indicated on the packaging. A post-operative blanket for cats should fit perfectly, so measure your pet in advance: length from the base of the neck to the base of the tail, chest volume.
Nadya, normal for a cat is once every 2-3 days. if there is no stress, then once every 1-2 days. for example, this is how they walk
It’s great if the bandage is packaged in a transparent bag. Usually these are low-quality products, but high-quality blankets can be seen without opening the packaging
Pay attention to the seams - the stitching is perfectly even, no protruding threads. Since you need to tie a cat blanket so that the pet does not remove it, inspect the ribbons - they are thick enough, durable, securely attached to the bandage, and also without protruding parts.
Source
How to put a collar on a cat?
A postoperative collar is put on a cat, mainly after castration of cats, so that it does not lick the stitches. Also, there may be cases of sterilization, so you need to put a collar on your pet. Castration is not a complicated operation; both testicles are removed from the cat. It is done under general anesthesia, and after just a few hours the cat can go home with its owners. You need to make sure that no dirt gets into the wounds so that they do not become inflamed.
How to put a collar on a cat? This special collar is sold in every veterinary clinic, so you can buy a collar where you had surgery. Next, we put this collar around the cat’s neck and fasten it. During feeding we take it off and then put it on again. Don’t forget that our pet loves to drink, and since now he needs strength to recover, he simply needs to drink water often. Therefore, do not be lazy and take off your collar for this, then put it on again. And so on until the stitches heal.
During this period, it is recommended to use white cat litter in order to immediately notice blood stains; if any appear, then you will need to contact the clinic. If self-absorbable suture material was used during the operation, then you will not need to go anywhere after the operation, all the sutures will dissolve themselves.
In the first hours after surgery, it is necessary to monitor your pet, as it will be difficult for him to recover from anesthesia. At this time, you need to make sure that he doesn’t hit himself or fall; it’s better if he sleeps, and everything will go away in his sleep.
The Siamese cat is the truth itself with a grimy face, it is beautiful
Some time after the operation, the cat’s hormonal levels will change, he will not yell or leave marks, he will be calmer and more serene, his urine will not have a strong odor. During the postoperative period, fish should be excluded from the cat’s diet, as it increases the development of urolithiasis in him.
Source
How to wear?
There are times when the veterinarian did not put a collar on the animal or when you made one yourself. In such cases, the question arises: “how to put it on correctly?” To do this, you need to follow some simple rules. First, you need to measure the cat's neck so that the collar fits. It should not dangle, but also not put pressure on the neck.
Then prepare the collar. Attach it to a collar or piece of soft cloth. If the animal is scared, then take it, wrap it in a soft towel and calm it down. You need to put on the collar very carefully so as not to cause harm. Many animals do not like having foreign objects put on them, and cats can behave aggressively. In this case, you will need an assistant.
Then you will have to hold the cat by the scruff of the neck. Once her head is in the collar, try to calm her down. Then attach the collar to your neck. Check that nothing is pressing or loose. There should be a finger space between the collar and neck.
Review of Perfect Fit food
Perfect Fit is produced by the well-known company, which produces popular economy class products - Whiskas. Many professionals say that Perfect Fit products, although slightly better than Whiskas, are not up to par with premium food. These reviews apply to both dry and wet food.
has been producing products for cats for several decades, this company operates internationally. Perfect Fit is translated from English as “perfect fit.” In principle, the quality of such products for cats is not at the lowest level, but also very far from ideal.
All Perfect Fit cat food products are packaged in bright packs that attract the attention of buyers. But what is important for the consumer is not the packaging, but the composition and quality of the product.
Not one of the Mars branded foods does not contain natural meat, but in premium foods, although in small quantities, it is present. Perfect Fit contains dehydrated poultry protein, with chicken protein present at 31%. Consumers may think that the food consists of 31% poultry meat, but this is not true.
Here is an example of the composition of Junior Perfect Fit kitten food. Here's what it says on the box: dehydrated poultry protein (including 31% chicken), corn protein, animal fat, corn meal, corn, dried liver, wheat breakdown products, potassium chloride, cellulose, rice (at least 4%), dried cereal protein, salt.
If you read the information about this food on the manufacturer’s official website, it immediately becomes clear that this is an absolutely ideal food for kittens. The company positions its products as optimally balanced feed in its composition. You shouldn't believe this. First of all, study the information about the composition of other foods, for example, Berkley or NOW Fresh.
Perfect Fit manufacturers have carefully developed the composition of their products. They claim that for cats their products are absolutely balanced in terms of the presence of vitamins and minerals that animals need. Again, do not forget that this is just a marketing ploy and in order to get proper nutrition, you should not completely switch your pet to Perfect Fit products.
Like any cat food, this product has its pros and cons.
Benefits of Perfect Fit cat food:
- Low cost.
- Can be purchased in almost any store, both specialized for animals and in a regular supermarket.
- Assortment for kittens and cats, dry and wet food.
Disadvantages of Perfect Fit cat food:
- Almost all proteins are of plant rather than animal origin. Cats are carnivorous animals, and they require animal proteins to grow properly.
- The composition uses a lot of corn to create volume. This is a fairly cheap filler.
- There is no natural meat, only offal.
All Perfect Fit products are represented by 8 types of food.
- Junior - food for kittens and teenagers. Suitable for babies up to 6 months. They need a diet different from that consumed by adults. A growing body needs more minerals and vitamins. Perfect Fit food for kittens and adolescents contains vitamins C, E, as well as essential minerals. This food is produced in the form of small granules, so the animals’ gums and teeth develop better.
- Active - for active pets. This food is suitable for very active adult cats. Such food helps the animal to always be in shape. To maintain the physical activity of cats, the food contains a lot of protein, vitamins A and B, and useful minerals.
- Sensitive is a dietary food. Well suited for animals that suffer from allergies or suffer from indigestion. The product is suitable for maintaining a diet. Contains only natural plant ingredients, no soy or wheat waste. It is very important to give this type of food to cats that suffer from liver and kidney diseases.
We suggest you familiarize yourself with: Leash and collar for ferrets
I n-home - for adult domestic cats. This type of food is suitable for animals that are not active and never walk outside. To prevent your cat from becoming obese due to a sedentary lifestyle, she needs special nutrition. To maintain proper metabolism, this food contains biotin and omega acids.
- Sterile - for castrated and sterilized individuals. Sterilized animals also require special care. The composition includes useful substances that help normalize weight and balance metabolism.
- Senior - nutrition for older cats. Suitable for animals over 8 years old. Older cats require special nutrition that does not contain the vitamins and minerals necessary for activity during adolescence. This food is rich in antioxidants for a beautiful shiny coat, taurine for healthy heart function and glucosamine for strong bones and normal joint function.
- Hair{amp}amp;beauty - for the beauty of the fur of cats. Designed for the care of long-haired cats. Perfect Fit H air{amp}amp;beauty products contain beneficial vitamins and minerals that give the coat a beautiful, healthy shine.
- I n-form - to maintain normal weight. Used in feeding animals that lead a sedentary lifestyle and are prone to obesity. This can happen after suffering some kind of illness, as a result of which the metabolism is disrupted. The product contains L-carotene, which promotes the rapid breakdown of fats.
Wearing rules
Several conditions for wearing the structure must be observed:
- Heavy and voluminous collars should not be worn, as this will limit the animal’s movements too much.
- The size must be appropriate for the pet, for example, for a small kitten you need to buy or make a suitable cone.
- Cover sharp edges with electrical tape, adhesive tape, or tape, otherwise the cat may get hurt.
- Do not let your pet outside, it is unsafe.
- Make sure that the animal can easily reach the bowl of food and drink.
- If the pet refuses to eat, feed it by removing the collar.
- Inspect the skin under the collar while wearing it.
- Brush your pet, because because of the barrier he cannot groom himself.
- Provide free living space.
- Isolate from other animals.
- Wear until recovery, when the wound has completely healed and the veterinarian allows you to get rid of the collar.
You should put on the collar carefully, without making sudden movements; it is better to do this together.
Modeling lesson: Patterns for cats. Harness
Have you decided that your cat needs to dress up? What does he think about it? It is usually much more difficult to agree on this topic with a cat than with a dog. If your cat has an easy-going disposition and doesn’t try to jump into the first tree he comes across during a walk, then you can do without a carrier and use a harness (to be on the safe side, after all). The harness can be made fashionable and elegant, for example in the form of a vest.
So, I hope you're agreed. Now it's just a matter of small things - take measurements, choose fabric, a strong ring, a carabiner and a leash.
The most important thing is to take your measurements correctly. After all, if you miss the size, the cat will slip out of your clothes and be like that. Well, if, on the contrary, you take measurements, laying the measuring tape very tightly, then the cat will have to lose weight.
How to do it yourself?
As mentioned earlier, it is quite possible to make a blanket with your own hands, and not just purchase it in a specialized store. So, you can make a good bandage yourself from a sock. Let's look at how to do it step by step.
- Take a sock that matches the size of the animal. You can use things made of nylon.
- Cut holes in the sock for your pet's paws and tail. If the neckline is too long, it will need to be shortened.
- Make holes on the back, similar to those on sneakers.
- Thread the lace crosswise through the holes. Try the resulting blanket on the animal and carefully tighten it.
You can quickly and easily make a blanket from tights with your own hands. This is one of the most affordable options that does not require any special resources. However, it must be borne in mind that it is not recommended to use old tights for this, since absolute sterility must be maintained in the postoperative areas.
In addition, it is advisable to look for high-density tights. This type of “cover” will fit the pet’s body much better and will last much longer. The following is done simply:
- from the selected tights you need to cut a piece with a length of 20 cm;
- then the cut piece is put on the cat’s tummy, and that’s all.
A bandage can also be made from an old T-shirt or a new piece of fabric. If you are using new material, then you will need to determine some pet parameters in advance:
- its length from neck to tail;
- length from neck to shoulder blades;
- from croup to tail;
- neck girth;
- distance between the front legs;
- chest circumference;
- girth of the tummy in the groin area.
All clarified data should be transferred to a piece of paper, making a schematic drawing of the future product. You will need to leave a small margin - 0.5-1 cm in length to make the ties. Next you need to act like this.
- Transfer all the marks you made to the prepared piece of fabric. It is advisable to use textiles in two layers to make the blanket more durable.
- Using the prepared diagram, cut out all the necessary parts. Fold in the seam allowances and make a stitch on the sewing machine, having previously overcast the edges of the item.
- Next, sew on the ties.
- The resulting product must be tried on the cat in order to make certain adjustments, if any are required.
The main advantage of this option is that it is possible to adjust the blanket to the specific structure and characteristics of the pet. True, it will take much more time to make such a cape than one made from a sock or tights.
Features of operation
Even a properly selected protective accessory will cause temporary difficulties for your pet. In addition to movement, it will affect eating and hygiene. For faster adaptation, follow these recommendations:
- Remove the collar while feeding or hand-feed food to your pet.
- Brush the coat daily to prevent matting and assist with hygiene of other body parts as needed.
- Organize the space in the house so that the animal cannot get stuck in too narrow passages.
Do not let the cat outside and limit communication with relatives until the end of use. Periodically check the tightness of the cone and the condition of the skin and fur in contact with it.
How to wear?
After surgery, baleen patients are dressed in protective clothing by veterinary clinic staff. In all other cases you will have to deal with this yourself, so just follow the instructions:
- Prepare the accessory and attach it to a strip of soft fabric, bandage or collar - if it does not fasten itself.
- Immobilize your pet with a towel and pick it up. For convenience, call an assistant to delineate responsibilities.
- Carefully put on the cone, holding the animal by the scruff of the neck, and secure it with a fastening element (fabric, bandage, collar). If the recommendations from the veterinarian indicate injections in the withers, place the clasp away from the injection site.
- Make sure your finger fits between the neck and the cone.
We recommend reading: How to make a house for a cat (10 ways): do it yourself, step-by-step instructions, play complex at home, made of cardboard, scratching post, examples in the photo
Be sure to praise your pet and give him treats, if this does not conflict with the therapeutic diet.
When to shoot?
The service life is individual. It depends on the speed of regeneration and the severity of the existing wound. The exact time of wearing is determined by the veterinarian, based on the condition of the mustachioed patient. Until this point, removing the cone is strictly prohibited.
What if the cat doesn’t get used to it and removes its protection?
Don't be upset if immediately after putting on the protection your pet tries to take it off. Adaptation usually takes several days. If it drags on for a long time, make sure that you have not made one of the common mistakes:
- The wrong size to make it easier to remove, or the presence of sharp edges that rub the neck.
- Insufficient attention. During the rehabilitation period, the animal is very vulnerable, so try not to leave it alone.
- Unsuitable material. Your cat may be annoyed by noisy plastic or an opaque design that obstructs his view. In this case, just choose another model.
Be sure to take short breaks at first. When removing the cone, hold your pet in your arms or otherwise control his behavior to prevent him from licking the wounds.
When does a high collar become necessary?
- The doctor advises putting a hard and high collar on the pet’s neck after castration, sterilization and other operations . These animals have an innate habit of licking their private parts after using the toilet. If a cat touches a fresh wound with such a muzzle, it may become infected.
- scratch wounds with their claws or teeth , which is also dangerous . You should not allow your pet to lick its fur and skin after it has been treated with chemicals . Such toxic and hazardous substances include various flea sprays, tick ointments, antibacterial drugs, and hormonal creams.
- When lichen is treated with antifungal agents, which are applied to the inflamed areas of the skin. If the product enters the esophagus, it can cause poisoning, and a high collar will prevent such entry.
- The device also saves in the case of applying a bandage to an animal's wound . The cat will try to remove the bandage or gauze bandage, thereby damaging the wound.
