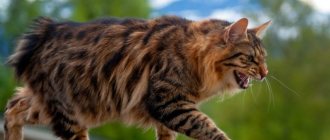
Any thing made with your own hands is considered not only exclusive, but also “alive” because a piece of soul, warmth, and energy was sewn into every detail. Interesting toys Tilda cats, bunnies, bear cubs, chickens will decorate any home and will serve as a wonderful gift.
Creating a tilde with your own hands will not take much time, but the result will delight you for a long time. Many magazines and the Internet present a large selection of life-size tilde cat patterns; you can easily sew a toy with it.
Pattern of a fat hare tilde
To create a bunny toy, many needlewomen use a life-size tilde cat pattern, adjust the ears - enlarge them to the desired size, or take a ready-made bunny pattern.
The pattern is pressed tightly to the fabric, outlined with chalk, and allowances are taken into account when cutting. Sew along the drawn line; the places on the cat pattern marked with a dotted line are left unstitched; through them the parts are turned right side out. The next stage is to carefully iron all the seams. All parts are filled with filler so that each element is soft; you should not stuff it too tightly; the toy may tear. Next, the unstitched areas are carefully sewn by hand. All parts are assembled into one product. Sometimes clothing patterns for tildes of a cat, a hare and others are added to the main toy patterns.
It is not necessary to sew outfits according to the proposed patterns; you can come up with an original costume yourself.
Craft material
First you need to consider the fabric.
Mainly suitable:
- Solid color material;
- Felt or cotton.
Important. It is advisable not to use stretchable material, otherwise the shape will quickly change.
Romantic cat
The parts of the product can be connected either with glue or sewn on by machine. The second option is more preferable. The glued parts may fall off after the first wash.
Types of filler:
- Cotton wool;
- Synthetic fluff;
- Various cereals;
- Sawdust - you can also add aromatic oil to it;
- Rubber balls.
You need to fill it very tightly, try to compact the filler so that the toy becomes more voluminous.
Textile toys
Tips for using tilde patterns
Before you take the tilde cat pattern, cut the fabric and sit down at the sewing machine, you should read the recommendations of people who have experience in sewing tilde, perhaps many tips will help you avoid problems when creating a toy, while others will encourage you to create, for example, clothes for cats, interesting registration
All seams are made only from the wrong side, otherwise the toy will look sloppy.
It is necessary to leave allowances along all seams; if you are sewing a garment for the first time, it is recommended to leave 0.5 cm, for more experienced ones - 0.3 cm. If the allowance is large, at the end of the work the excess fabric is cut off, leaving 0.3 cm to the seam.
From all the variety of types and forms of tildes, choose the one you like best, they have almost the same complexity. The tilde cat pattern can be downloaded from the Internet, which opens up the opportunity to adjust the size of the future toy. Using graphic editors on a computer, you can enlarge, compress, or stretch the pattern to the required size.
Material for cats and their clothes are washed and ironed before cutting.
You should strictly follow all the recommendations for the pattern, tucks, darts, they must be laid as indicated, otherwise when assembling the toy, the joints may not match.
When sewing a cat with your own hands, in places where parts have a fold, in rounded places, you should make notches in the allowance, this allows you to avoid the formation of folds and irregularities.
The finished part is turned inside out using a long object with a blunt rounded end (pencil, pen); if you take a pointed long object, you can tear the fabric.
For the filler, choose one material for all parts; it has proven itself well for these purposes - padding polyester, padding polyester, alpolux, holofiber.
When decorating the face, choose small black beads for the eyes, and dark embroidery threads for the nose and mouth. In principle, the face can be drawn with a thin black marker or fabric paint.
Reviews
I was looking for how to sew a cat out of fabric with my own hands, and ended up here. I made a cat out of fleece using patterns from the article. Everything turned out well, thank you. The only thing is that I added a little decor to the toy to make it more interesting for the child.
Marina
My friend has been a fan of the cartoon “Kitty” since her student years. I decided to sew her a gift for her birthday so that she could show off everything and “kitten”. I didn’t think it would be so difficult, but the first time it turned out well. Here are some interesting pattern options. I will definitely try to make a decorative pillow for myself.
Lisa
Originally posted 2018-03-19 06:35:40.
Two-legged cat tilde
It is an excellent option for those who are afraid to start sewing. The cat pattern is simple, even a child can do it.
All parts are paired, except for the nose. They cut, sew, and in all tilde-style patterns leave an unsewn space for turning and filling.
To obtain a neat nose, the part is pulled together at the edges, forming a “bag”, filled with stuffing, the threads are tightened, and the part is closed. Sewn to the head. Unlike a standing cat, the tilde two-toed cat does not stand; it is usually hung on a hook or door handle.
Beads are sewn on the eyes with black thread and a mustache is embroidered. At the stage of designing the face, you need to show your imagination - eyes, nose, mustache can be made whatever you want, to suit every taste.
Let's decorate our cats
If the cat , we need to decorate it. How to do it?
Let's look at the options:
- Using simple threads, embroider “eyes”, “nose”, “whiskers” and “smile” on the fluffy’s face;
- Make a cute bow on your ears, neck or tail;
- Button eyes will look great;
- A valentine or a flower in the paws of a mustachioed tabby will be very useful.
Now that we have disassembled all the components, let's start making toys .
Pattern of a fat cat tilde
A fairly simple product to make, well suited for beginner needlewomen. The cat pattern is adjusted to the desired size of the future toy. Patterns are cut out of thick paper.
The pattern is transferred to the wrong side of the fabric, seam allowances are taken into account, and cut out. When sewing a cat, they start with paired parts, iron them, fill them with filler, and carefully sew open areas by hand. Collecting a toy. You can complement the cat tilde with various items and homemade decorations.
Let's diversify models
If you are doing it with your child, think about what he with his own hands . From here the complexity of the toy will depend.
Perhaps it will be:
- One-piece, as in the video . This is a very simple cat. In the video we do them with my son
- Or, consisting of several parts: head, body, paws, ears and tail. I will tell you about it further.
- Or maybe these will be cats in love ? Can you do this with a toddler? The principle is the same as with one-piece ones, just the shape is different. Click on the pattern, save and print, or simply trace on the screen, attaching a sheet, do not forget to scale the image as you need.
Take into account the age, abilities, and perseverance of your baby if you do it with your child so that it is interesting for him.
Master class on making tilde cats
When cooking, the toy looks very cute, pleasant to the touch, and will serve as a wonderful addition to the interior. A small master class will help you create crafts.
The tilde cat pattern consists of a small number of parts.
To sew a toy you will need: basic plain fabric, colored fabric for clothes, lace, ribbons, black beads for the eyes, black fishing line for the mustache, dark threads, 4 buttons to match the main material, filling.
Cut out a paper pattern from thick paper or cardboard. The cat pattern is transferred to fabric folded in half, secured with needles and outlined with chalk. Taking into account seam allowances, cut out. They begin work on assembling the toy from the head, sew it together, leaving a small hole unsewn for turning it inside out and fill it with filler, after which the hole is sewn up by hand. The same operation is carried out with the ears.
A distinctive feature of this Tilda cat doll toy is that all its legs move as if on hinges. This effect is achieved in this way: using buttons, the legs are sewn to the body, poking it right through, and the upper or lower legs are sewn at the same time.
The tail is made similarly to other parts, sewn to the back of the body.
The eyes are decorated with beads or simply painted, the nose is embroidered with thread, the cheeks are painted with special fabric paints, the antennae are drawn with fishing line, pulled through the muzzle, their length is limited only by imagination.
The way to make a dress pattern for a cat is to measure the required length and width of the dress from the doll. A rectangle is drawn on paper based on the data obtained. At this stage, you should reduce the top part of the dress - you get a trapezoid. Transfer the pattern to colored fabric, cut out two parts and fold them face to face, sew them together with your own hands or on a machine, leaving holes for the arms and head. A hole is made for the tail using scissors. Decorate the dress with lace, ribbons, bows. Tilda is ready.
Dress for a cat: we make an outfit with our own hands
To participate in exhibitions, tailed pets are well suited for a fashionable dress that can be created at home. This dress can be sewn using a standard pattern. Choose any soft-feeling fabric, the size of which should depend on the size of the cat itself.
Step 1. For the pattern you will need the length of the cat's back. Divide this parameter by ten - the resulting figure will be equal to the size of the cell. For example, with a back length of 20 centimeters, you will get a square with sides of 2 centimeters. Make a line on a piece of paper, place the sides and bottom there (as shown in the picture). Take into account all the edges and carefully count the number of squares so as not to make a mistake.
Step 2. You should have three parts - two sides and a bottom. Cut out the sides and bottom, then sew them together. The incision is present only on the upper part, which is located on the neck.
Step 3. Sew on a beautiful decorative button if you want to further decorate the dress.
Don't make the dress too tight, especially if the fabric is non-stretchy. Also, the animal may become confused in its movements if the dress is too loose. You should not think about making a dress that is too fluffy - such options are only suitable for holidays or exhibitions, during which the cat will not be able to move, but will sit in one place.
When making a holiday suit, you can sew it from a new beautiful fabric, and for daily wear you can use an outfit from old things. Your cat will find it easier to accept things that smell familiar.
Selection of schemes
#462 Salomon
Fabric cutting
The creative process is quite simple:
- First, you need to turn your socks inside out. The first sock will be needed for the head and tail, the second - for the body and four legs. If your child is helping you, you can give this task to him. If the products are terry on the inside, then the reverse side can be the front side, so that the cat from the sock turns out to be fluffy.
- You can turn the toe horizontally to make it more comfortable. Then draw paws on it.
- On the second sock we draw ears. The heel will become the muzzle a little later.
- Next step: cut and fold along the seam. You need to cut not directly according to the drawing, but retreating a few millimeters so that you can sew along the drawn lines.
Finishing touches
The final stage is not at all difficult. We sew on buttons as eyes, embroider a nose using satin stitch, embroider a smile, make wide stitches on the paws. A sock cat can be just cute, or it can be cheerful and funny. If the child who is helping you is still small and does not know how to sew, then he cannot be trusted with this task. Since you make the product yourself, the degree of cheerfulness of the cat depends only on your imagination. The smoother you embroider, the more serious and accurate the work will be.
It turns out to be such a wonderful hand-made cat made from a sock! Any baby and even an adult child will be delighted with such a toy. If you rarely do sewing, then you should start with these easy-to-create and beautiful toys. Any socks will do. Color, texture, thickness of fabric, fluffy or not - you choose. The craft can be decorated to suit every taste.
Show your imagination how you want your cat to look. You can finish drawing his mustache and also embroider it. Or sew thin strips of fabric in the form of a mustache. Or maybe make a hat for him and sew on a butterfly? Your cat will turn out to be a real gentleman! Or is it a stylish and fashionable cat? Then she will need a bow or a flower, a headband or some other decorative element.