Where to begin
To understand the characteristic anatomical features of a cat, you need to observe it for some time. It would be useful to look into the scientific literature, but if there is no desire to become a professional artist, it is not necessary to delve into the structure of the skull and analyze the attachment of the muscular frame to it. To begin with, a reference of the cat's face is created - schematic drawings in different positions. This allows you to track changes in the animal’s appearance, depending on the tilt of the head and the emotions experienced.
There is no need for shading or deep elaboration of details; it is enough to “catch” the image. The shape of a cat's head fits perfectly into a circle, and in some breeds into an oval. The muzzle is elongated, but not pointed, like a dog’s, the head is large, almond-shaped, most ears are erect, triangular in shape.
Let's take a closer look at the simplest reference. It is known that the head of an animal or a person is drawn in three positions: profile (side view), full face and ¾. The last option is the most difficult and requires certain artistic skills, since we are talking about perspective. But a full-face image, when the front part “looks” directly at the viewer, is much more accessible for beginners.
Step-by-step instruction:
- Using a pencil or thin marker, draw the basic shape of the head. It is almost round with a slight expansion downwards. We outline a central vertical line and a transverse one passing at eye level. Next, we designate the triangles of the ears, the contours of the nose and mustache pads.
- We outline the eyes. They are spaced wide and at an angle. A cat's face can be easily distinguished from a cat's by its eyes; the latter's are slightly smaller. Draw the mouth.
- The sensitive cat's nose fits well into the triangle, pointing downwards. Draw an arched chin.
- Since the head is voluminous, the lower line of the ears cannot coincide with its contour; they will always be a little lower. We immediately depict fluffy wool, applying short strokes in different directions.
- Actually, the reference ends here. This is followed by a detailed drawing in one line of the coat, whiskers and eyebrows. It makes an excellent base for pencil drawing.
How to draw a cat's head
The cat has a round head with a short muzzle. Its eyes appear large and directed forward, giving the cat excellent depth perception.
Note the large eye sockets and short muzzle of the cat's skull.
Drawing a cat's head from the front step by step
1. Draw a circle with a pencil and divide it in the center with vertical and horizontal lines.
Get 10 free video lessons
Ten free video lessons from the Kalacheva School drawing school are available immediately after registration.
Using promo code REFPART
— 10% discount on all courses with teacher verification until the end of 2021!
Get
2. Add two vertical lines on either side of the center line, dividing the head into three parts.
3. Draw the ears and nose.
4. Add the leading edge of the ears, a triangular nose pad, and an inverted V shape to represent the mouth.
Start adding the top of the eyes. The highest point in oval eyes is located just behind the vertical lines that divide the face into three parts.
5. Finalize the details. Add the pupils and complete the eyes by leaving a dark “tear duct” at the inner corners of the cat's eyes that leads to the nose.
Add strands of hair inside the ears and ear pockets.
Ear pockets are the pinched area on the outer edge of the ears.
Add a line just below the head circumference outline, pointing towards the front where the ears meet the head.
6. Outline the sketch with ink (liner or gel pen), adding nostrils at the same time. Let the ink dry and erase the pencil lines.
Another way to build a cat's head
Notice that there is an almost imaginary line running from the inner corner of the ears to the inner corner of the eyes and down to the outer corner of the nose pad. These (partially) imaginary lines create a space between the cat's ears, eyes and nose that narrows as it flows toward the nose pad. Keep this in mind when drawing a cat's face from any angle.
Drawing a cat's head from the side step by step
1. Start with a circle and lines in the center. Then divide the left side of the circle into two equal parts and add a third line at the same distance to the left of the circle.
2. Draw a shape that resembles an upside-down V or a swoosh to represent the nose, tear duct, and top of the eye. Draw a curved line to represent the mouth, making sure the corner of the mouth matches fairly closely to the highest point at the top of the eye. Add the nearest ear and its base.
3. Use a V-shaped line to complete the eye. The outline of the eyeball should curve outward (forward, to the left in this picture) to indicate its rounded shape as it protrudes from the socket. The lower eyelid should tilt upward to meet the outer corner of the eye.
Add a nostril and a line to represent the outer and inner parts of the ear. Continue a line from the outer corner of the eye down the cheek. Draw the far ear.
4. Draw the pupil and shade the tear duct. Indicate the front "cheek" or bulge under the eye. This is where a piece of bone protrudes and wraps around the bottom of the eye socket, protecting the eyeball. Above the eye, show the cat's "forehead" (and where the whiskers attach).
Draw long hairs inside the nearest ear, which are attached to the inside of the front edge and swept back. Finish the ears by adding an ear pocket visible on the nearest ear.
5. Complete the drawing with pencil or ink.
Draw the cat's head from a three-quarter (3/4) perspective
Now let's draw a more three-dimensional portrait of the cat when its head is turned towards us by about 45 degrees.
1. Draw a circle with vertical and horizontal lines that meet where the center of the muzzle will be. Take the "+" shape from the previous drawings, but turn it at a three-quarter angle.
2. Add a circle for the base of the ear. Draw the nose. Note that the nose (and muzzle) does not extend far beyond the circle of the head.
3. Add the ears and eyes, noting that the eyes are slightly wider than the top plane of the nose underneath them.
4. The dotted lines in the picture below show how the top and bottom edges of the eyes line up, even at this angle. Continue drawing the eyes, curving the outline down and toward the nose on the far eye. Add the inner corner of the close eye. Also add the outline of the cat's face and chin.
Add a line just inside the outline of the cat's closest ear to indicate the rim.
5. Complete the contours of the cat's eyes by sharply lifting the bottom edge up to meet the outer corner of the eye.
Add one visible nostril and finish with a cat's mouth. Add fur to the cat's ears and draw a line connecting the inner corners of the two ears. Continue the line to the farthest ear, defining its inner and outer sides. Add an air pocket (in front of the main rim at this angle).
6. Start drawing the fur. Draw the cat's pupils. Notice that the pupil of the farthest eye looks closer to the inner corner of that eye than the pupil of the closer eye. This is due to the angle at which the far eye is viewed.
7. To finish the piece, ink it in, add a mustache, and darken the inner corners of the eyes to define the tear duct area.
How to draw cat eyes
The cat's eyes are large and oval shaped. Their pupils are usually vertical ovals, but they change depending on the lighting. In the dark, the cat's pupils will be large and almost round. In broad daylight, a cat's pupils will be narrow, vertical slits. Cat eye colors range from amber, yellow and green to deep blue.
1. First sketch out the eyes with a pencil.
2. The first application of ink goes over most of the lines already drawn in pencil. You can use a dotted or broken line to show the texture or shades of the fur. The thickest and most continuous lines are used to draw the eyelids and tear duct areas.
3. At this point, use very short, dotted strokes to shade the eyeball under the upper eyelids. Also shade the areas along the tear duct. Define the fur using quick strokes.
4. I recommend using a smaller diameter pen or liner to draw fine details on the eye. Using a pointillism technique (filling space with dots), add shading to the eyeballs and subtly define the highlights of the eyes.
Use very short pen strokes to lightly shade the curved edge on each eye. Still using a liner or smaller diameter pen, draw very short strokes throughout the fur to give it volume and depth.
5. To finish the drawing, shade the eyes and tear ducts until you are satisfied with their appearance. Then go over the fur, using longer strokes in some cases and shorter strokes in others, adding variety and depth to the fur.
On the outer edge of the cheek of the farthest eye, draw long hairs protruding from shorter ones. This creates the appearance of longer "guard hairs" emerging from the shorter, fluffier undercoat. Below we will look in more detail at how to draw fur.
Many short strokes drawn very close together provide subtle shading in some areas such as the space between the eyes and behind the outer edge of the eyes.
Drawing a cat's nose
The cat has a small, triangular nose that can be pink or black.
1. First, draw a vertical rectangle and a slightly curved line about a third down from the top of the rectangle.
2. The cat's nose pad is drawn in a shape similar to a heart.
3. Add nostrils and mouth.
4. Finish the drawing with a pen by shading the nostril area and erase the pencil lines.
Cat face and mouth
Cats have many sharp teeth and a tongue like sandpaper.
Take a closer look at some of the shapes of the cat's face in a half-turn. Notice how many shapes flow into one another.
The cat has many whiskers on its face, some above its eyes, and some on its cheeks. Whiskers grow from rows of hair follicles. Most often, cats have four main rows of whiskers, but this number can vary.
Drawing cat ears
Cat ears are triangular. Like dogs, they have ear pockets on the outer edges of their ears.
Fur on ears
At the base of a cat's ears there are strips of fur that run in different directions and can create characteristic ridges and lines in the hair where they meet. One such area of fur is the area in front of the inner corner of the ear. The fur at the beginning of the ear is often thin and tends to stick almost straight out of the skin. By studying cats, you can get an idea of where these spots and ridges are on the cat's head and body and what they look like from all angles.
Ear pocket
An ear pocket is a small, pinched area of jagged skin along the outer edge of the ear. This is common to many animals. If you look at it from a certain angle, you can see an indentation along the contour of the ear.
A Closer Look at a Cat's Ear
Notice the strip of fur running from the inner edge of the ear to the other side. There is a small patch of shorter hair at the inner base of the ear that is sometimes visible. Pay attention whether you always draw it or not.
Maximum realism
It is best to depict a naturalistic cat's face based on a photograph. However, it is unlikely that you will be able to simply copy what you see. You need to understand the laws of conveying volume and aerial perspective on paper so that a two-dimensional sheet “comes to life”, turning into a small domestic predator.
Pencil drawing
The best place to start diving into the world of fine art is with graphics. The black and white face of a cat requires only working with chiaroscuro, whereas in painting you will have to carefully select color relationships. The most popular and accessible graphic tool is the pencil. A drawing created with its help can be easily corrected, and a technique such as shading allows you to disguise sloppy strokes and gives the composition an airiness.
It is recommended to use pencils of two types of hardness: hard H or F for drawing auxiliary lines, and soft - 2B and higher for outlining.
Step-by-step instruction:
You can draw from life, but it’s unlikely that a living “model” will want to pose for a long time. And only true masters can “grab” both the desired angle and the shadow ratio in a few minutes. So let's look at the photographs again. Having chosen a suitable image, we first make a reference (sketch), determining the rotation and tilt of the head, approximate proportions, and the position of the light source. The last factor is needed to create volume on a plane - the illusion of perspective is created precisely by shadows.
- So, first sketch out the cat’s face with a hard pencil H (at least F). It leaves light, barely noticeable lines. There is no need to try to make them brighter by pressing on the stylus. There will be dents left, which, after the sketch outline is erased, will be visible in the drawing.
- We take the ball as a basis. Let’s complicate our task and draw the head in a half-turn. The central line becomes not straight, but curved, repeating the shape of the ball.
- We remove the auxiliary lines with an elastic band or knead. We replace the hard pencil with a soft one, the best option is 2B. A lead that is too greasy is undesirable for beginners; it is difficult to erase, since some of the pigment remains, is smeared on the paper, and the result is “dirt.”
- It is best to start detailed drawing with the eyes. We emphasize dark shadows in the corners of the eyelids. We also draw the remaining parts of the muzzle, highlighting the foreground more strongly: the nose, mouth and ear.
- Apply a striped pattern to the cat's forehead. We try to copy it as accurately as possible.
- The background will help highlight the foreground and immediately make the image “alive.” We use a special shading or rub the applied strokes with cotton wool (a piece of cotton fabric).
- Our light source is on the side to the right. Therefore, we shade the left side of the animal’s muzzle, chest and ears. The lightest tone should be at the top, the darkest at the bottom. You can take pencils of different hardness so as not to make a mistake.
- We are doing fine detailing of the ears. Draw the fur inside each of them.
- Let's move on to the eyes. Pay attention to the pupils - in the light they narrow, turning into vertical “risks”, in the dark they expand, becoming round.
- Draw the fur in the area between the ears and eyes. Do not forget that the shadow behind is thicker than in the foreground, where the conventional light source is located. Apply short, energetic strokes directed along the growth line.
- We continue “filling”. Leave the whisker pads, lower jaw and stripes around the eyes light. Use a clean, thick rubber band to “draw” a mustache.
- We darken the left side of the body as much as possible. This is a falling shadow from the head. Before doing this, we outline the white mustache with a B2 pencil to make it stand out more clearly.
- All that remains is to smooth out too strong contrasts, add tone to the neck, and correct inaccuracies, if any.
The pencil drawing of the cat's face is ready. It turned out impressive and realistic.
Profile drawing using the same technique:
The history of flat-faced cats
It is generally accepted that people domesticated the first cats about 12 thousand years ago. Moreover, at that time these were wild animals living on their own in natural conditions. And various cat breeds began to actively appear in the last few centuries, as specialists bred various animals with a specific skeletal structure and coat color to suit different needs and requests.
The history of flat-faced cats begins around 500 BC. The Dutch traveler noted in his notes that he saw amazing cats with long and fluffy hair at the court of the first kings of Persia, Cambyses and Darius.
It was the Persian kings who were the first to glorify the new breed of cats; Cats got their name from the name of the state
Thanks to his beautiful appearance, the future progenitor of Persian cats (and this is how the story of the appearance of “Persians” in the world begins) was the favorite of many royal and noble persons. The preservation of the randomly obtained breed was ensured until the 16th century, when the Persian cat was brought to Europe.
Here, the “Persians” also became favorites at the courts, and therefore the development of the breed continued to the form that we can see today.
Felinological organizations are very sensitive to determining whether an individual belongs to a particular breed. Thus, according to various estimates, from 35 to 74 cat breeds are still recognized in the world. The Persian cat is one of those breeds that have been recognized by all felinologists in the world.
And, for example, British cats were originally called “shorthair” in England and were registered as a separate breed in the 1930s. However, the history of the breed goes back to the Middle Ages, when, due to a gene mutation, cats with flattened faces began to appear at the court of the English nobility.
Around the 1920s and 1930s, Sweden and the United States began crossing Siamese and Persian cats, eventually creating a new breed, the Himalayan cat. Only by 1980 was it possible to consolidate breed standards and distinguish the Himalayan as a separate species of cat.
In the 1960s, Persian and American Shorthair cats were crossed in the United States. As a result, a new breed appeared, called exotic. Exotics initially frightened breeders with their appearance, but the breed quickly gained popularity: first in the USA, and then in other countries of the world. In the early 1980s, exotics were legalized as a full-fledged cat breed.
The story of the Scottish cat begins very unexpectedly: the farm cat Susie was born with a strong mutation (brachycephalic skull shape and small ears bent forward). In the 1960s, there were no such pets in Scotland, so Susie's offspring were crossed with British cats. As a result, it was possible to create a new breed, which was named Scottish in honor of the place of residence of the ancestor cat.
Scientific point of view
A cat's unusual flattened face is the result of a serious genetic disorder. In scientific circles, this phenomenon is called “brachycephaly.” The term is literally translated from Latin as “short head” and indeed, in brachycephalics, the length of the head occupies up to 80% of the width of the skull and is strongly flattened in front.
The skeleton shows that the skull has a rounded surface and is flattened in the front.
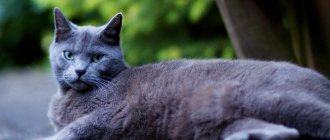
There is a point of view that domestic cats inherited this skull shape from their common ancestor - the wild cat Pallas's cat. However, whether this is actually the case is not known for sure.
Geneticists and breeders have worked to ensure that, over the course of all generations, the brachycephalic features of the skull have been fixed in some cat breeds. The work was carried out in such a way that only those individuals whose flattened muzzle was the main feature were crossed.